Category Archives: IT Support

Aruba 2930M JL322A Switch Stack Replacement

This blog post is a step-by-step tutorial on replacing an Aruba 2930M JL322A 48 Port POE+ switch. This will cover the backup or configuration, pre-installation configuration (physical and logical), and physical installation of the switches into production.

  • Assumptions
    • You have unboxed all parts and have confirmed all are present.
    • You have knowledge of how VLANs work and know how to properly connect the new stack to your core switch/router for testing purposes (tagging the correct VLANs on the right ports).
  • Notes
    • Do not power on or plug in the switches until you have the stacking cables connected!
    • I use the traditional web GUI!
    • I have had issues with downloading the config using the download button on the web interface.
  • Parts rundown
    • 4x Aruba 2930M JL322A Switches
      • This includes power supplies and rackmount equipment.
    • 2x Aruba JL083A SFP+ expansion card
    • 1x Aruba SFP+ GBIC
    • 4x Stacking Cables
  • Getting the current config from the old switch stack
    • Log into your switch stack’s IP address.
    • Navigate to the “System” section and to the “Updates/Downloads” subsection.
    • Click the Download button to get the current configuration.
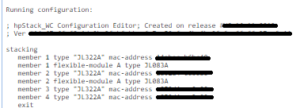
    • Since you are doing this on a new switch stack, you want to delete the stacking config from the text file you downloaded. After deleting all of this from the file, you have a perfect config to paste into the new switch stack.
    • DELETE ALL OF THIS
    • You can alternatively go into the “Troubleshooting > Configuration Report” section to see the config in plain text on the web interface. You can then copy it into a text file and do the same thing if you have issues downloading it.
  • Connecting Power Supply
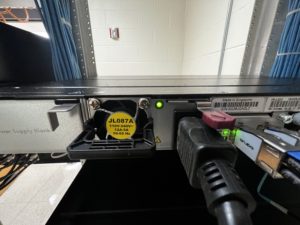
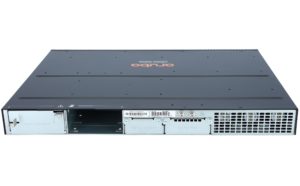
    • Focus on the back of the switch, there will be two empty slots on the back. Remove the cover from one of the power supply slots (it doesn’t matter which) like the image shown below.
    • Once the cover is removed, you can insert the power supply such as in the image below.
  • Connecting Stacking Modules
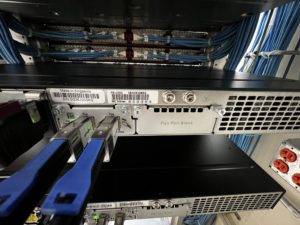
    • Next to the power supply modules, there will be a port for the stacking module in the middle as shown in the image below. You need to remove the two screws circled in blue to take off the cover plate.
    • Once the cover plate is removed, you can insert the stacking module as shown in the photo below
  • Connecting SFP+ Expansion Card and Inserting GBIC
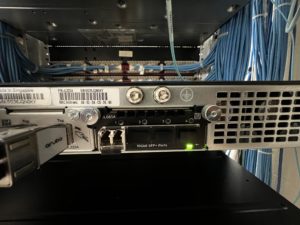
    • On the far right, there is one last empty slot. This is for the SFP+ expansion slot. You need to remove the cover plate much like the stacking module cover plate. Once it is removed, you can slide the expansion card into the slot. It takes a little more force than expected; push until you hear a light click. You can then screw the card, remove one of the coverings, and insert the GBIC (it doesn’t matter which port you use, I decided to use port 1). See the photo below for reference.
  • Plugging in the stacking cables
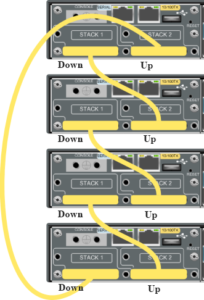
    • Once you have all modules installed, you can connect the stacking cables. There is a diagram shown below (A different switch but the same outcome). Put simply, connect port 1 to port 2 on the switch under it and repeat.
  • Powering on and connecting to console
    • Connect power to all switches. It will take 5 or so minutes to do the first-time boot process. You will know they are booted when there is a series of orange lights followed by a flash of green. After this is complete you can connect to the switch via the console port using a serial cable from another PC/Laptop.
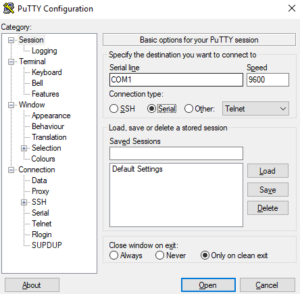
    • Open PuTTY. You can then select the “Serial” option and connect to the switch.
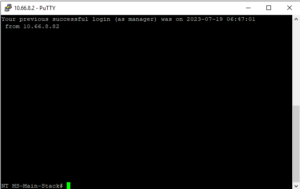
    • Once here, you will log into the “manager” account and set a new password for first-time setup. You can then enter “show stack” to confirm all switches are connected and ready in the current stack.
  • Configuring switches
    • At this point, you are ready to configure the switch stack. You will basically just paste the backup text file you made during the “Getting the current config from the old switch stack” step.
      • If you want, you can change the configuration file to have different IP addresses for the VLANs. This will allow you to connect to the current stack and test connectivity before doing physical installation into the stack. For instance, you can change VLAN 1 to “192.168.5.3” instead of “10.66.5.2”. This will allow for testing without conflicting with the current switch stack.
    • Method 1 – CMD Only
      • Go into global configuration mode using the “conf t” command.
      • Copy the config file and paste it into the console you are connected to by right-clicking. You can do small sections at a time to scan for errors as you go if you wish.
      • WHEN YOU ARE DONE, DO A “write mem” COMMAND TO SAVE CHANGES.
    • Method 2 – Web GUI
      • Connect to the web interface (you can get your switch’s IP address using the “show ip” command).
      • Log in and navigate to the “System > Updates/Downloads” section.
      • Here you can download, upload, delete, and rename the config file. You will upload the file and update it.
  • Test Switch Configuration
    • After doing the config import, you can test various ports by plugging a PC into each port and seeing what IP address you get (this will test for connectivity and VLAN configuration). Ping outside addresses through the switch CMD, check the running config, check the stack status, etc).
  • Physically Swap the Switch Stack
    • This is pretty straightforward. Unplug everything from the old switches; do one switch at a time and keep track of which cords go to which port if you need to.
    • Unscrew from the rack and replace it with the new one.
    • Plug all ethernet cables into the new switch and eventually the stacking cables whenever all switches have been swapped out.
    • Give power to the new production stack.
    • Connect to the web GUI once the stack is up.
    • Change the IP addresses of the switch if you need/want to and be done!
  • Other Commands
    • To change VLAN IDs on multiple ports
      • conf t
      • vlan 1
        • Or whatever VLAN ID you want
      • tagged 1/1-1/48
        • This is to tag every port from port 1/1 to 1/48. This same command works for untagged as well.
      • write mem
    • To change the IP address of a VLAN interface
      • conf t
      • vlan 1
        • Or whatever VLAN ID you want
      • ip add 10.66.x.x 255.255.2xx.0
      • write mem
    • To remove an IP address from an interface
      • conf t
      • vlan 1
        • Or whatever VLAN ID you want
      • no ip add 10.66.x.x 255.255.2xx.0
      • write mem
    • To make an interface get an ip address from DHCP
      • conf t
      • vlan 1
        • Or whatever VLAN ID you want
      • ip addr dhcp-bootp
      • write mem
    • To disable ipv6 on all VLANS and OOBM
      • conf t
      • oobm
      • no ipv6 enable
      • no ipv6 address DHCP full
      • exit
      • vlan 1
        • Or whatever VLAN ID you want
      • no ipv6
      • no ipv6 address DHCP full
        • Rinse and repeat until you get through all VLANs.
    • To show all modules on a switch (stacking modules and SFP+ modules
      • show modules
    • Updating the firmware of the switch
      • Log into the web GUI
      • Go to the “System” tab and the “Updates/Downloads” subtab.
      • Under the “Software Image” section, click the “Update” button next to primary.
      • Choose the switch file you downloaded from Arubas website
      • Click the “Save” button and reboot the switch stack (they will all upgrade if they are stacked).
    • Get a list of ACL’s
      • show access-list
    • Showing details for the switch (System Name, System Contact, System Location, MAC Age Time, Time Zone, and the System Serial Number).
      • show system

Creating and Uptime Kuma Server Using Docker

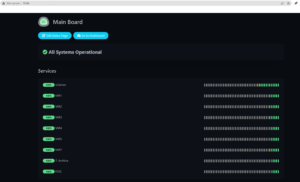
This tutorial will cover creating an Uptime Kuma server using a Docker Container. Uptime Kuma is a monitoring software meant to create simplistic dashboards that track the uptime of websites, servers, or anything that can be pinged.

  • Assumptions
    • You have an Ubuntu 18.04/20.04/22.04 virtual/physical machine made.
    • The machine is up to date (apt-get update AND apt-get upgrade)
  • Install Docker
    • sudo apt-get install docker.io
    • You can check the installation by doing “sudo docker ps” and seeing if it outputs an error or not
  • Create an Uptime Kuma Docker volume
    • docker volume create uptime-kuma
  • Run the docker container
    • docker run -d –restart=always -p 3001:3001 -v uptime-kuma:/app/data –name uptime-kuma louislam/uptime-kuma:1
  • Connect to the interface and create a user account
    • The default web interface port is 3001 so you can navigate to the web GUI by entering IP_ADDRESS:3001 in your web browser.

Building a TrueNAS Server on an Icebreaker 4936 Server – WIP

This blog post is a tutorial for creating and configuring a TrueNAS server with a Broadcom SAS2108 Raid Controller using RAID 1+0 (RAID 10). There will be a Youtube video linked below showing the whole setup process from start to finish.

OS: TrueNAS

  • Assumptions
    • You have already completed the “Quick Start Guide” by connecting the raid controller components to each other inside of the case.
    • The hard drives have already been slotted into the hot swap bays.
    • The system is able to be powered on and is capable of entering BIOS.
    • You have created a TrueNAS bootable USB drive.
  • Connect a keyboard and monitor to the server(a mouse is not required).
  • Power on the machine to boot to the RAID controller.
    • After the initialization screen and the HDD check screen, there will be a brief moment where you can press “ctrl + R” to boot to the RAID controller.
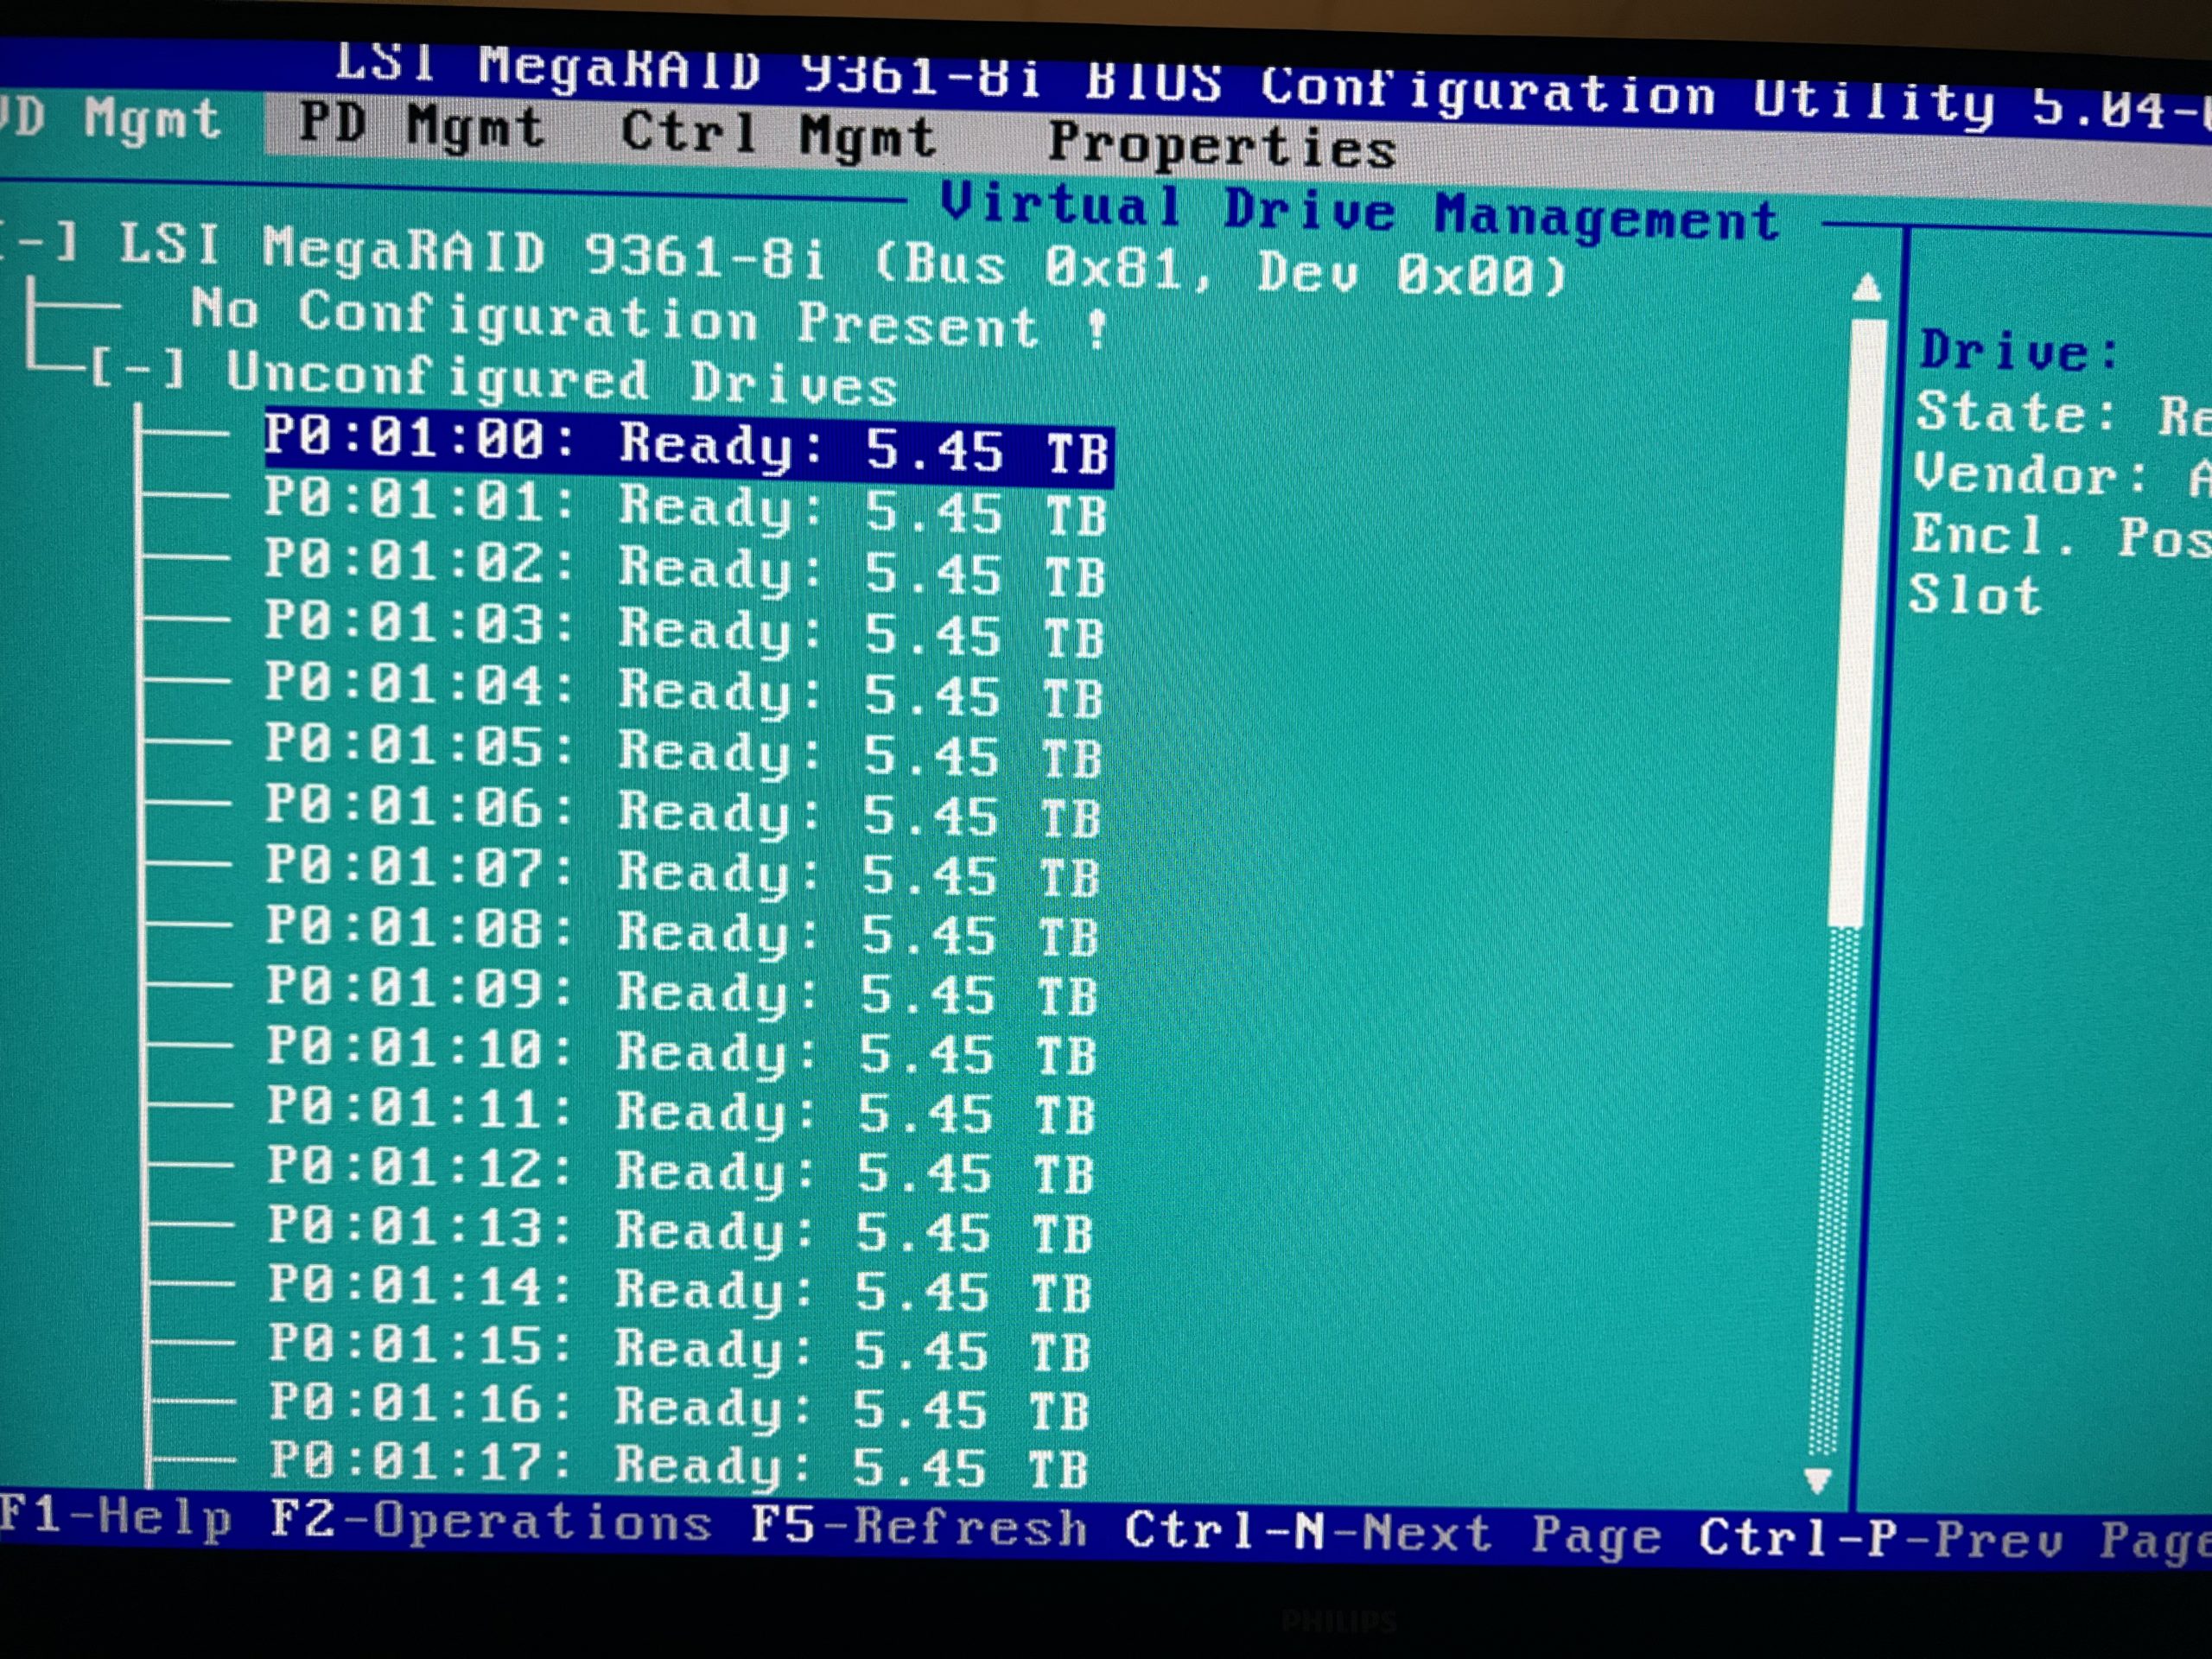
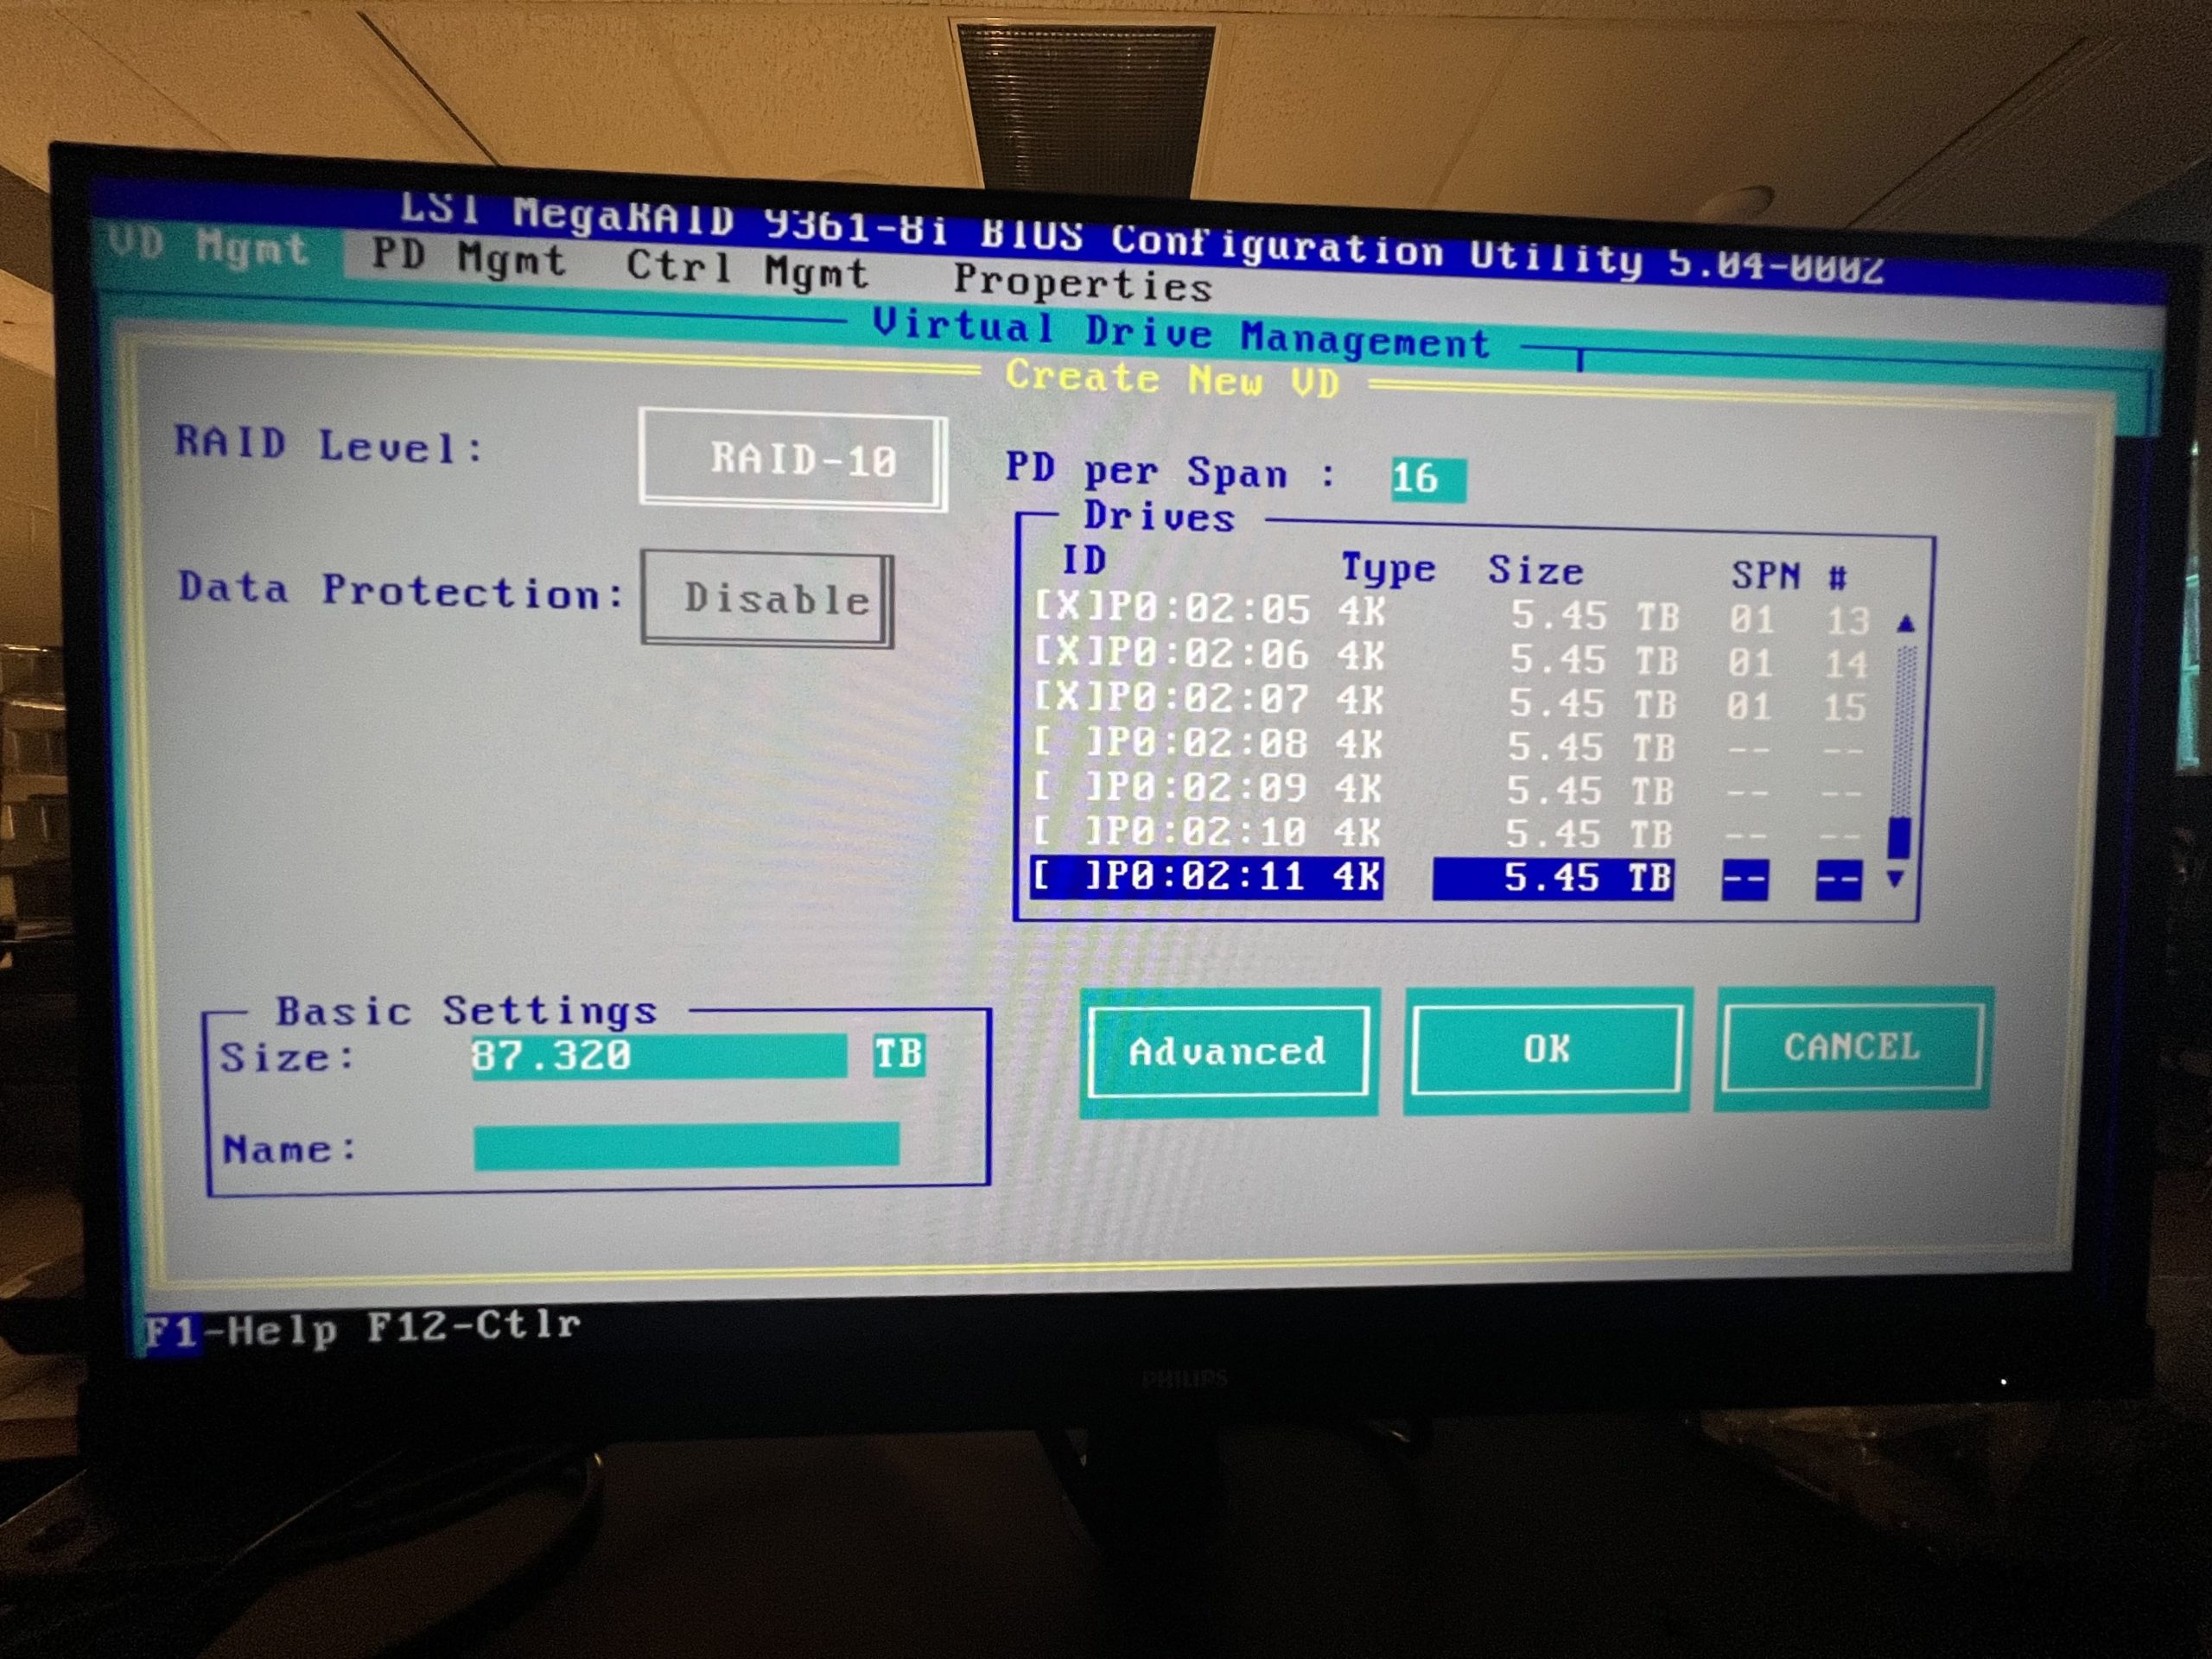
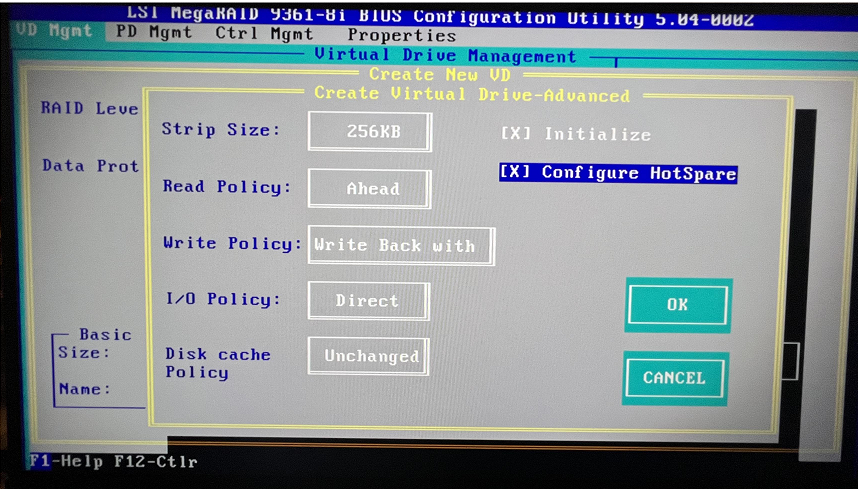
    • Once on the controller interface, you can select your RAID configuration. This includes the RAID level, which drives you want to use, setting up hot failover, and how many physical drives you want for each logical drive. In my case, I used RAID 10 with 18 drive logical drives (18 striped, 18 mirrored).
      • The RAID card included with this server supports RAID 0, 1, 5, 6, 10, and 50. For more information and visualizations of the different raid levels, visit the link HERE.
    • Once you are done with configuring your RAID setup, you can save and power off the machine.
  • Insert your TrueNAS USB stick into one of the free USB slots (I recommend USB 3.1 if possible).
    • Power on the machine and boot to BIOS (the key for this specific machine is “delete”.
    • Navigate to the boot section.
    • Set the first boot option to your TrueNAS USB drive
    • Save and reboot the machine
  • Go through the TrueNAS Installation
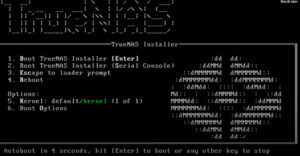
    • Once at the installation screen, you can press “1” to start the installation method.
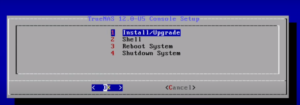
    • After the initial initialize page, you can press “1” to select the “Install/Upgrade” option
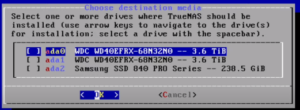
    • You will then be prompted to select which drive you want TrueNAS to be installed on
    • You can then say yes to your data being wiped, enter a password, and to “Boot Via BIOS” you can choose UEFI if you want, I just chose BIOS since it is compatible with our legacy devices.
    • Say yes to creating a 16GB swap file if you have the storage for it.
    • Let the installation complete,
    •  remove the USB drive when prompted, and reboot the system. This is the last step before TrueNAS boots.
  • Enter the Web GUI
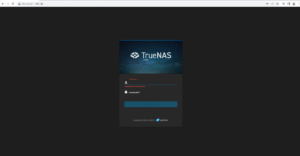
    • Once the machine has loaded the OS, you can then view the IP address in your web browser to get to the TrueNAS web GUI. The default username is “root” and the password is the one you set during the installation.

Creating an Ubuntu 22.04 Archive/Backup Server

This blog post is oriented toward creating a backup server using Linux Ubuntu 22.04 (or basically any fairly recent version of Ubuntu Linux)

All commands are in RED!

All actions are in BLUE!

All variables are in GREEN!

OS: Ubuntu 22.04

  • Assumptions
    • You already have a VM/Physical machine set up
    • You have 2 connected drives (still need to be configured)
    • You have gone through the Ubuntu setup steps (creating an account, installing the OS, and are currently on the Desktop)
    • You will be doing this whole install as the root user (I will provide the command in the instructions)
  • Open Terminal
    • Enable Root
      • sudo -i
        • Enter password
    • Update Linux/Packages
      • apt-get update
      • apt-get upgrade
    • Install gparted (for configuring drives and partitions)
      • apt-get install gparted
        • Y
    • Open gparted
      • gparted
    • Change the disk you are viewing to the one you need to add/create partitions for using the dropdown located at the top right of the program
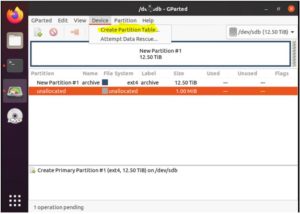
    • Create a new partition table
      • Click device tab
        • Click “Create Partition Table”
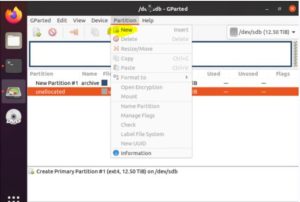
    • Create a new Partition
      • Partition tab
        • Click “New”
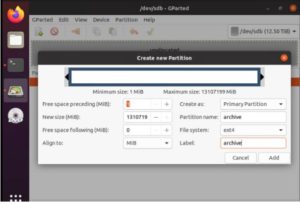
      • Enter the following settings (mostly default, the name of the partition can change)
        • Click “Add” in the bottom right
      • Click the green checkmark to apply the settings you changed
    • Give yourself permission to edit the partition you made
      • Open terminal
        • Cd /media/LINUX USERNAME/
        • To list your disks, enter “ls -l’
        • Change permissions of the drives
          • Chown YOUR_USERNAME:YOUR_USERNAME PARTITION_NAME/
      • The path to your drive is now in /media/YOUR_USERNAME/PARTITION_NAME
    • Create 2 folders and create identical subfolders for each backup you need
      • Folder 1 – mnt
        • Folder 1 – TestBU1
        • Folder 2 – TestBU2
        • Folder 3 – TestBU3
      • Folder 2 – backups
        • Folder 1 – TestBU1
        • Folder 2 – TestBU2
        • Folder 3 – TestBU3
    • Create a script on the Desktop called “archive.txt”
      • Add a “shebang” line
        • #!/bin/sh
      • Enter the commands to mount the backups to the /mnt/ directory
        • mount -t cifs -o username=<WINDOWS ACCOUNT USERNAME>,password=<WINDOWS ACCOUNT PASSWORD> //<IP ADDRESS OF SHARE>/<SHARE NAME> / /media/<LINUX ACCOUNT NAME>/<PARTITION NAME>/mnt/TestBU1
          • EX: mount -t cifs -o username=winbackups,password=backmeup //192.168.0.100/share/ /media/LINUX ACCOUNT NAME/PARTITION NAME/mnt/TestBU1
      • Enter the commands to navigate to that directory
        • cd /media/<LINUX ACCOUNT NAME>/PARTITION NAME/mnt/TestBU1
      • Enter the commands to copy the files from the /mnt/ to the /backups/ directory
        • cp -ur //media/<LINUX ACCOUNT NAME>/<PARTITION NAME>/mnt/TestBU1/foo.txt //media/<LINUX ACCOUNT NAME>/<PARTITION NAME>/backups/TestBU1
      • Enter the commands to exit to the root directory
        • cd /
      • The following would be an example of the finished file
        • #!/bin/sh#Test1BU
          cd /
          mount -t cifs -o username=winbackups,password=backmeup //192.168.0.100/share1/ /media/larchive/archive/mnt/TestBU1
          cp -ur /media/larchive/archive/mnt/TestBU1/foo1.txt /media/larchive/archive/backups/Test1BU

          #Test2BU
          cd /
          mount -t cifs -o username=winbackups,password=backmeup //192.168.0.100/share2/ /media/larchive/archive/mnt/TestBU2
          cp -ur /media/larchive/archive/mnt/TestBU2/foo2.txt /media/larchive/archive/backups/Test2BU

          #Test3BU
          cd /
          mount -t cifs -o username=winbackups,password=backmeup //192.168.0.100/share3/ /media/larchive/archive/mnt/TestBU3
          cp -ur /media/larchive/archive/mnt/TestBU3/foo3.txt /media/larchive/archive/backups/Test3BU

    • OPTIONAL: Make it a cron job
      • Open terminal
        • cd /etc/cron.weekly/
        • cp man-db /home/LINUX ACCOUNT NAME/Desktop
      • Edit the man-db file and add your own custom commands (it will contain exactly what is in the archive.txt file you made).
      • Rename the “man-db” file on the desktop to “archive” 
        • sudo cp /home/LINUX ACCOUNT NAME/Desktop/archive/ /etc/cron.weekly/
      • This job should now run weekly

Creating a Nagios Core Monitoring Server

Nagios Core (formerly known as just Nagios) is a free tool that can be used to monitor networking equipment, server equipment, and general networking infrastructure. This is a command line tutorial therefore this can be done on either the desktop or the CLI version of Linux.

  • OS Requirements
    • Ubuntu Linux 20.04
  • Install Required Packages
    • apt install wget unzip curl openssl build-essential libgd-dev libssl-dev libapache2-mod-php php-gd php apache2 -y
  • Install nagios core
  • Extract the downloaded files.
    • sudo tar -zxvf nagios-4.4.6.tar.gz
  • Navigate to the setup directory.
    • cd nagios-4.4.6
  • Run the Nagios Core configure script.
    • sudo ./configure
  • Compile the main program and CGIs.
    • sudo make all
  • Make and install group and user.
    • sudo make install-groups-users
  • Add www-data directories user to the nagios group.
    • sudo usermod -a -G nagios www-data
  • Install Nagios.
    • sudo make install
  • Initialize all the installation configuration scripts.
    • sudo make install-init
  • Install and configure permissions on the configs’ directory.
    • sudo make install-commandmode
  • Install sample config files.
    • sudo make install-config
  • Install apache files.
    • sudo make install-webconf
  • Enable apache rewrite mode.
    • sudo a2enmod rewrite
  • Enable CGI config.
    • sudo a2enmod cgi
  • Restart the Apache service.
    • sudo systemctl restart apache2
  • Create a user and set the password when prompted.
    $ sudo htpasswd -c /usr/local/nagios/etc/htpasswd.users admin

How To Create a Mirth Connect Server On Ubuntu 20.04

  1. Create an Ubuntu Desktop VM
  2. Change IP address to desired address either through DHCP or statically on the machine
  3. Update Linux
    1. apt-get update
    2. apt-get upgrade
  4. Install Java and SQL
    1. Open the terminal
      1. sudo apt install default-jre
    2. Install sql
      1. sudo apt install mysql-server
  5. Make sure java installed
    1. Open terminal
      1. Java -version
  6. Go to https://www.nextgen.com/products-and-services/mirth-connect-downloads 
    1. Download the Linux.tar.gz file for the Linux installation
    2. Install the Administrator version as well
  7. Extract the 2 downloads and move them to the /opt/ directory 
    1. tar -xvzf /path/to/filename.tar.gz
  8. Open New terminal
    1. Move downloads from desktop to /opt/ directory
      1. Cd Desktop/
      2. Sudo mv /DOWNLOAD ONE NAME/ /opt/
      3. Sudo mv /DOWNLOAD TWO NAME/ /opt/
  9. Confirm that the files are in the /opt/ directory
    1. cd /opt/
    2. ls
      1. There should be 2 files in the /opt/ directory (the two you downloaded and moved)
  10. Enter the mirth file to find the configuration file
    1. cd Mirth\ Connect/
    2. ls
    3. cd /conf
    4. ONLY DO THIS IF YOU WISH TO EDIT CONFIG FILE
      1. nano mirth.properties
      2. You will not be free to edit the configuration files.
    5. Cat mirth.properties
      1. You should now be in the server properties of mirth. Edit these files if you wish to (username, password, port numbers)
  11. Lave the configuration file
    1. Cd ..
  12. Launch the server
    1. ./mcserver
  13. Connect to the server via web browser

IF YOU DECIDE TO USE THE ADMIN PROGRAM

  1. Open a new terminal window
  2. Navigate to /opt/ directory
    1. Cd /opt/
  3. Go into the mirth admin program
    1. cd mirth-administrator-launcher/
  4. Run the launcher
    1. ./launcher
    2. You should not be loading into the admin panel where you can enter your server credentials.

Exporting a Docker Image to Docker Hub

  1. Enter the root user account
    1. sudo -i
  2. View current running docker containers to find the one you want to upload
    1. Docker ps -a
  3. You can make sure its the correct machine by interfacing with it and checking the files
    1. Docker exec -it <CONTAINER ID> (EX: 50b2e9d0dff6) bash
      1. Docker exec -it 50b2e9d0dff6 bash
      2. Here you can use it as you would a regular CMD Linux PC
      3. To exit the container, do the command: “exit”
  4. Commit Container to an Image (This turns the container into a docker image for reuse)
    1. Docker commit <CONTAINER ID> <DOCKER HUB USERNAME>/<Your_Image_Name>
      1. EX: docker commit 50b2e9d0dff6 mpeck/ubuntu-modified
  5. Log into your Docker Hub account on the docker-machine
    1. docker login
      1. You will then enter your docker hub username and password
  6. Push the docker image to Docker Hub
    1. docker push <username>/<Image_Name>
      1. EX: docker push mpeck/ubuntu-modified
  7. Check Docker Hub
    1. https://hub.docker.com/
    2. Log into the account you used to push the container
    3. Check the “repository” tab for your container.

Moodle Installation

Since the Moodle Docs site has been so sketchy, I decided it would be best to document my recent installation.
Note:  I am installed on a VMWare ESXi 6.5 Virtual Machine.  750GB SSD, 16GB RAM, and 8 Cores.

  • Install Ubuntu 16.04
  • If you are doing it on a VM, check Check CPU#, Increase Video RAM, and move LAN to the 1000e.
  • I immediately open root and do everything else as room
    • sudo -i passwd root
    • sudo passwd -u root
    • su
    • gedit /usr/share/lightdm/lightdm.conf.d/50-ubuntu.conf
      • Add the following lines to the bottom.
        [SeatDefaults]
        greeter-session=unity-greeter
        user-session=ubuntu
        greeter-show-manual-login=true
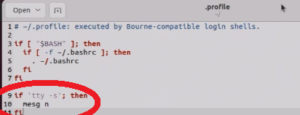
    • gedit /root/.profile
      • Delete last line -> mesg n
  • Reboot and logon as root
    • Update  and install vm tools
      • apt-get update
      • apt-get upgrade
      • apt-get install open-vm-tools
    • Install LAMP and required Moodle dependencies.
      • apt-get install apache2 mysql-client mysql-server php7.0 libapache2-mod-php7.0
      • apt-get install graphviz aspell php7.0-pspell php7.0-curl php7.0-gd php7.0-intl php7.0-mysql php7.0-xml php7.0-xmlrpc php7.0-ldap php7.0-zip php7.0-soap php7.0-mbstring
    • Restart the server and then create the Moodle database
      • reboot -r now
      • mysql -u root -p
        • CREATE DATABASE moodle DEFAULT CHARACTER SET utf8mb4 COLLATE utf8mb4_unicode_ci;
        • create user ‘username‘@’localhost’ IDENTIFIED BY ‘password‘;
        • GRANT ALL PRIVILEGES  ON moodle.* TO username@localhost IDENTIFIED BY ‘password
        • quit;
  • I make the folders for Moodle in the /var/www folder and initially open all permissions there.
    • cd /var/www
    • mkdir moodledata
    • mkdir moodlesql
    • chmod -R 0777 /var/www
    • If you are restoring a previous version.
      • cd /var/www/moodlesql  (or wherever the sql file is)
      • mysql -p moodle<moodle-database.sql
    • If you make a mistake you can always delete the database and start over
      • mysql -u root -p
        • drop database Moodle;
        • quit;
    • There are a couple tweaks I make to PHP before the installation
      • gedit /etc/php/7.0/apache2/php.ini
        • find “post_max_size”
        • Change the value to the number of Mb you want your site to accept as uploads
        • find “upload_max_filesize”
        • Change to the same value as above
        • Find “max_execution_time”
        • Raise to a larger value if needed (like 60-600)
  • Download Moodle from Moodle.org and extract the file to /var/www/html
    • Navigate to 127.0.0.1 in your browser and begin the installation!
  • When you are complete you may want to:
    • Reset your folder permissions
      • chmod -R 0775 /var/www
    • make your IP address a static one and then get that address permanently in the moodle config.php file until you have an actual web address to put in there.

]]>

Windows Server 2016 RDS Licensing Server

<![CDATA[Windows Server RDS works great for allowing thin clients to have a full desktop experience.  For RDS to work correctly, you must create a licensing server to hand out seats per client connection, whether that be per user or per device.  This guide will go step by step through the process of creating a licensing server to serve RDS seats.  We assume that you already have a Windows Server 2016 machine ready for this deployment.
In our environment, we use a separate virtual machines for each server role.  We use VMWare 6.5 as our host, and Windows Server 2016 as our VM client.  This server will only have this role installed.  Our base VM has any default roles that are installed out of the box, with an addition of the .NET 3.5 feature set.


Please make sure your server is set on the correct timezone, remote desktop is enabled, all Windows Updates have been installed, the server has been joined to your domain, and then restart the server.  When logging into the server, use a domain user account with Domain Admin privilege.


  1. Open Windows Server Manager and click Add roles and features
    1
  2. Click next confirming that you have verified the tasks listed.
    2
  3. Click next confirming that you are installing a role-based feature on the current server.
    3
  4. Click next to confirm that the server highlighted is the correct server for the role to be installed.
    4
  5. Select the Remote Desktop Services role and click next.
    6
  6. Click next on the features list, without checking an additional feature other than the defaults.
    7
  7. Click next to confirm that you want to install the Remote Desktop Services role.
    8
  8. Select Remote Desktop Licensing to install the licensing host components.
    9
  9. Click Next to install the role.  OPTIONAL: Check the Restart box and select yes to allow the server to restart after installation. (The server does not need to restart after installing this role.)
    10
  10. After the role finishes installing, click close.
    12
  11. Click on Tools > Remote Desktop Services > Remote Desktop Licensing Manager.
    14
  12. Click Review on the server you just created.
    15
  13. Click Add to Group.
    16
  14. Click continue to add the server to its correct licensing group.
    17
  15. This message will be received when you have completed the following step. Click ok to close the window.
    18
  16. Click ok to close the window.
    19
  17. Right click on the server you are trying to configure. Click activate server.
    20
  18. Click Next to configure the licensing portion.
    21
  19. Click next to use the automatic defaults.
    22
  20. Complete the required information for your organization and then click next.
    23
  21. Complete the required information for your organization and then click next.
    24
  22. Click next to start the licensing wizard.
    25
  23. Click next to confirm the settings are correct.
    26
  24. Select the correct type of agreement for your organization.  In our case this would be School Agreement.
    27
  25. Type the agreement number and select next.
    28
  26. Select the correct product version, license type, and quantity of licenses. Then click next to finish the wizard. In our case, RDS per user CAL is the correct licensing type.
    29
  27. Click Finish to close the wizard and activate your RDS licensing server.
    30
  28. Your server is now activated if the green check mark is displayed.
    31

This guide was to setup the licensing server portion of a remote desktop environment.  To setup the servers that clients/thin clients connect to, please see this post.]]>

Windows Server 2016 KMS Server

<![CDATA[Windows Server 2016 KMS – Office 2016 & Server16/Win10 KMS
Recently, we found that Server 2016 standard was having issues using the volume activation tools that are built in.  Instead of using the VAT role, we elected to build our KMS server through command line.  In this tutorial, I will walk you through the steps necessary to complete your new KMS install using Server 2016 Standard.
We are installing a KMS server for Server 2016, Windows 10, and Office 2016 Pro Plus clients.  (Other versions also activate as it is backwards compatible.)
Note:  We are using VMware Hypervisor 6.5 (Free), and our KMS server is running as a VM using Windows Server 2016 Standard (with desktop experience).  Screen capture images can be browsed here. -> Steps


  1.  Create a Windows Server 2016 Server (any edition).
    • Set the timezone, name (and join) your server with your Active Directory.
    • Enable Remote Desktop and set a static IP address (optional)
    • Check for, and install, all windows updates.
    • Reboot the server
  2. Install the Volume Activation Services Role through the server manager.  Click next through the entire process leaving the defaults.  (This GUI is what crashes for us, which is why we are using command line.)
    • Reboot the server once the installation completes.
  3. Visit the Microsoft Volume Licensing Center and obtain your KMS keys for Office 2016 and Server 2016.  Keep these for future reference.  While on the volume site, download “Office Professional Plus 2016 Key Management Service Host”.  It will be an ISO file.
    • Extract the ISO to C:\kms or an appropriate location.
  4. Use an elevated command prompt for all of the following steps
    • Install the Office 2016 KMS Host pack (What we extracted to C:\kms)
      1. cd c:\kms
      2. cscript kms_host.vbs
      3. After the VAT popup appears, close VAT and hit enter twice to return to a standard command line.
    • Install the KMS keys for Windows and Office, one at a time, waiting for the confirmation that the key has been installed prior to continuing to the next.
      1. slmgr.vbs -ipk <insert Server 2016 key here>
      2. slmgr.vbs -ipk <insert Office 2016 key here>
    • Export the licensing information.  This is for two reasons.  First, to make sure both keys have been inserted correctly, and to obtain the activation ID.
      1. cd c:\windows\system32
      2. cscript slmgr.vbs -dlv all >C:\kms\export.txt
        • cscript must be used to export the information into a txt file.
    • Open the recently created export.txt file, and scroll to the licensed products.  Copy the Activation ID‘s for both products and keep for the next step.  NOTE:  The Activation ID and Application ID are NOT the same, so make sure you obtain the correct ID.  The easiest way to find the correct product is to locate the Installation ID.  It will only be present on the two products that we have installed a key on (even though we will not be using the Installation ID.)
    • Activate your product keys.  Do each command one at a time, waiting for the confirmation before moving to the next.
      1. slmgr.vbs -ato <insert Activation ID for Server 2016 here with the dashes>
      2. slmgr.vbs -ato <insert Activation ID for Office 2016 here with the dashes>
    • Confirm that your products are activated and licensed.
      1. cscript slmgr.vbs -dlv all >C:\kms\export2.txt
        • Confirm that the two products identified before have “licensed” as their licensing status.
  5. Now your server is licensing clients.  There are thresholds that will determine when activation starts.
    • Windows Server will activate after a count of 5.
    • Windows 10 will activate after a count of 25.
    • Office 2016 will activate after a count of 5.

Additional Information about KMS:
A Server 2016 KMS key will activate all server editions up to 2016.  It will also activate all Windows Client editions up to Windows 10 including 7, 8 and 8.1.  The Office 2016 Professional Plus key will activate both Pro Plus and Standard Office 2016 installations.]]>