Category Archives: IT Support

Veyon Room Setup

Veyon Room Setup

By Wes Taylor | May 2026

1. Overview

This article documents how to configure a student machine for classroom monitoring using Veyon. Running the setup script will automatically create the necessary local group, add the teacher’s account, and register the room and all student computers in Veyon so they appear in Veyon Master.

The setup script handles:

  • Creating a local Teachers group on the machine
  • Adding the classroom teacher’s user account to that group
  • Registering the room location and all student computer hostnames in Veyon’s network object directory

2. Assumptions

This setup was designed under the following assumptions:

  • Veyon 4.x is already installed on the machine, or will be installed as part of this process.
  • The machine is on the school network and can reach the Scripts share.
  • You have administrator access to the machine.
  • The batch file (Run-VeyonSetup.bat) has been copied locally before running — it cannot be launched directly from the network share.
  • Room data is maintained in rooms.xlsx on the Scripts share.

3. Objectives

The primary goals of this setup process are:

  • Allow teachers to monitor and manage student machines using Veyon Master
  • Automate room configuration so it does not need to be done manually through the Veyon Configurator
  • Keep all configuration data in one central location (the Scripts share) so changes only need to be made in one place
  • Make the process repeatable — running the script more than once should not create duplicates

4. Technical Setup

This solution uses a PowerShell script called from a batch file. The script reads room data from a shared Excel file and calls veyon-cli.exe to configure Veyon.

Component Purpose
Run-VeyonSetup.bat Local launcher — runs both the installer and room config script
install-teacher.ps1 Installs Veyon, creates the teachers group, imports authentication keys
Configure-VeyonRoom.ps1 Reads rooms.xlsx and adds the room and computers to Veyon
rooms.xlsx Contains teacher account, room number, and list of computer hostnames
veyon-cli.exe Veyon’s command-line tool used to add locations and computers

5. Files on the Network Share

All files are located on the Scripts share. The batch file is the only file that needs to be copied locally.

6. rooms.xlsx Format

The Excel file has two sheets:

Sheet1 — Room Info

Column A Column B
Teacher JDoe
Room 306
Grade 7

Sheet2 — Computer Hostnames

Column A
S-306-701
S-306-702
S-306-703

7. Setup Steps

  1. Open the Scripts share in File Explorer
  2. Copy Run-VeyonSetup.bat to the local machine
  3. Right-click Run-VeyonSetup.bat and select Run as Administrator
  4. The script will run automatically. You will see output for each step:
    • Step 1 — Installs Veyon if not already installed. If Veyon is detected, it will say “Veyon is already installed. Skipping.”
    • Step 2 — Reads the room data, creates the Teachers group, adds the teacher account, and registers all computers in Veyon
  5. Press any key to close the window when complete
  6. Open Veyon Master on the teacher machine to verify the room and computers appear
Note: The batch file must be run locally. It will not launch if run directly from the network share due to Windows security restrictions. The PowerShell scripts it calls run from the share automatically.

8. Adding a New Room

To add a new classroom to the system:

  1. Open rooms.xlsx
  2. Update Sheet1 with the teacher username and room number
  3. Update Sheet2 with the full list of computer hostnames for the room (one per row)
  4. Save the file
  5. Run Run-VeyonSetup.bat on each machine in that room
Note: The script checks for existing entries before adding anything. Re-running it on a machine that is already configured will not create duplicates.

9. Troubleshooting

Issue Resolution
Batch file does nothing when double-clicked The bat file must be copied locally before running. It cannot be launched directly from the network share.
rooms.xlsx not found Verify the machine can reach the network share. Check the network connection and that the Scripts share is accessible.
Could not add teacher account Verify the username in rooms.xlsx matches the domain account exactly. Try prefixing with NTLS\ (e.g. NTLS\jdoe).
Computers not showing in Veyon Master Close and reopen Veyon Master after the script completes. If still missing, run the script again.
Script closes immediately with no output Right-click the bat file and choose Run as Administrator — it must be run with elevated privileges.
Duplicate locations appearing in Veyon Run veyon-cli networkobjects clear in an elevated PowerShell, then run the setup script again.


Setting SMTP Notifications on CyberPower OR2200PFCRT2U UPS

Required Items

  • Laptop with CyberPower PowerPanel Personal Installed
    • Click here for installation link
  • Ethernet Cable
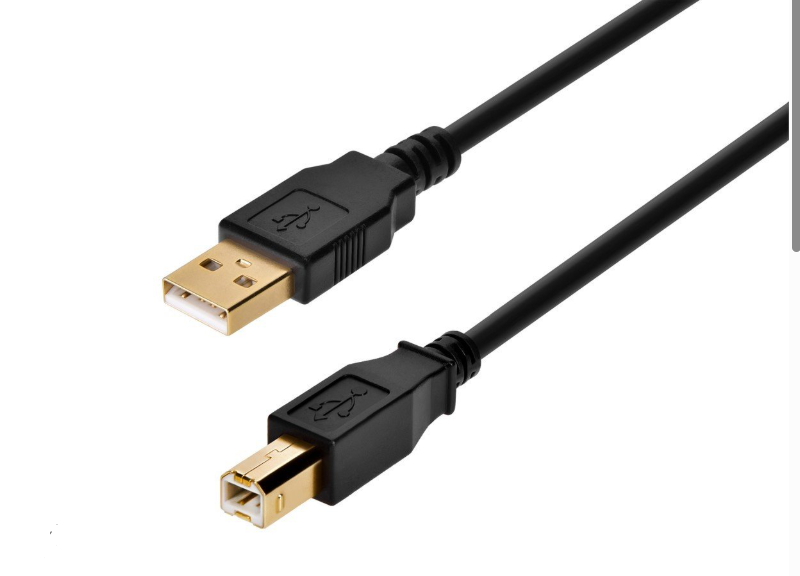
  • USB A to USB B cable (image below)

Instructions

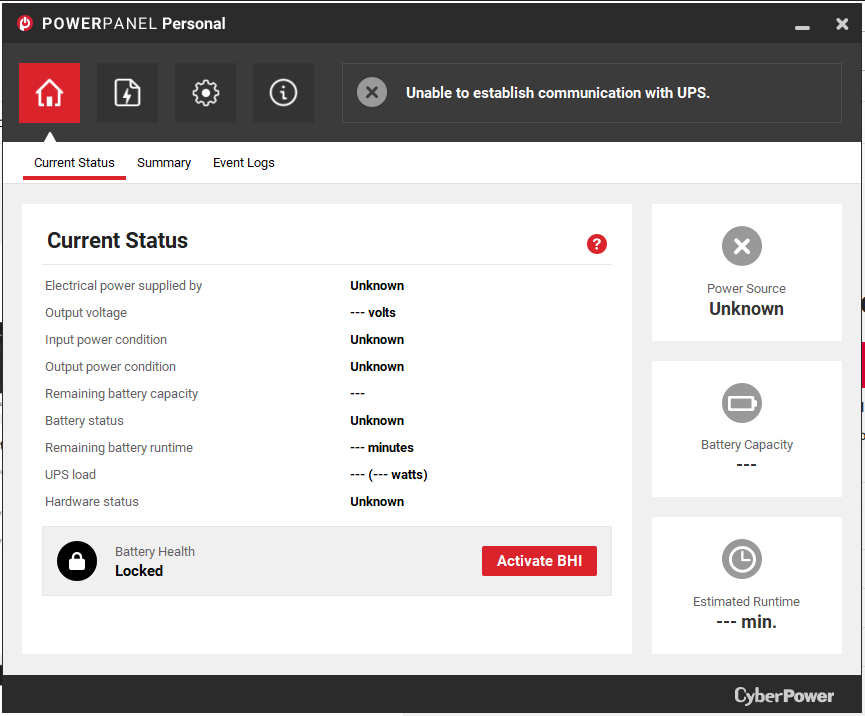
  1. Upon locating UPS (and if necessary installing PowerPlan Personal), open PowerPlan Personal and follow the checklist below.
    • Open PowerPlan Personal
    • You will be directed to a home screen that provides the current status of the UPS.
    • At the top are four pages that you may click on. They are a house, file, a settings cog, and an info page. Click on the settings cog.
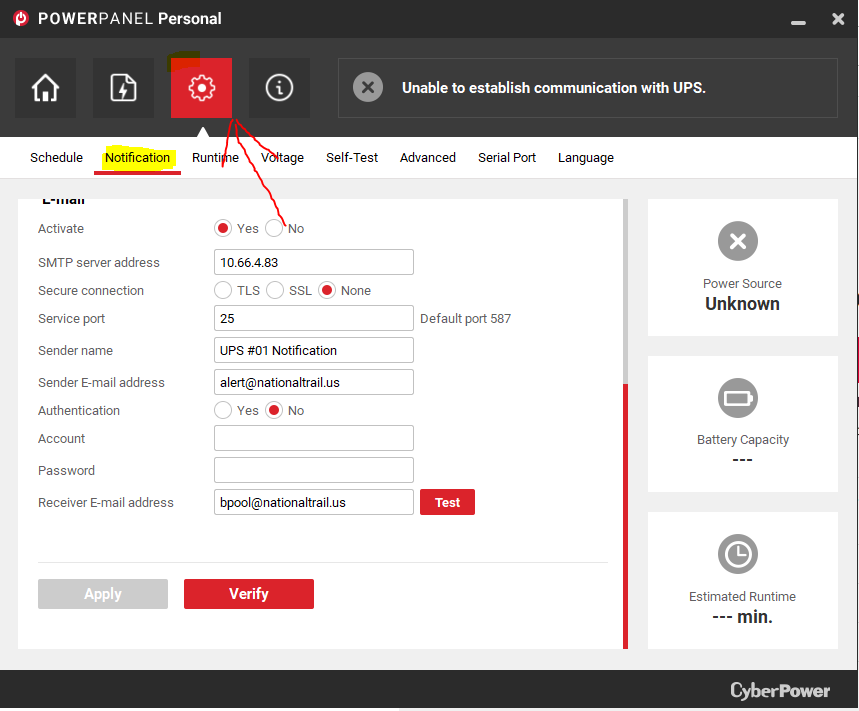
    • Below the settings cog more options will appear. Click on notification, and scroll to the bottom of the page.
    • This page is where the email can be configured. All configurations should be filled in, however, if they are not please reference image 2. The only thing you will need to change in this process is the sender name.
    • Set the laptop in a safe place and move on to step two. We will come back to the laptop later.

NOTE: The settings in the image above must be set as shown. If they are not, update them to match this image. The only thing that will be edited after the fact will be the sender name.

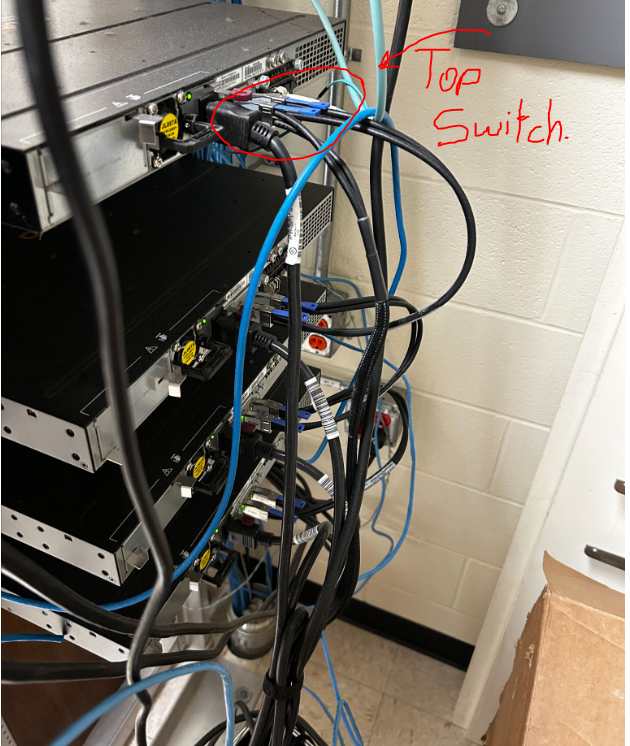
  1. Locate the top switch
    • The top switch should always be located at the top of switches in the server rack, however it is good practice to use the following checklists to verify.
      • Checklist 1:
        • It is likely that the switches will be labeled with numbers. Check the front panel of the switch for this number and locate switch one. Switch one will always be the top switch.
      • Checklist 2:
        • If the switch is not labeled you will need to locate the top switch via the switch stacking cables. The top switch will be at the top of these.
        • Some racks of camera switches in addition to communication switches, for instance, the maintenance closet which has camera switches as well. In this case, you will need to differentiate between the switches that connect to the cameras and the switches that do not. These switches will be labeled, and if they are not, check that they are connected via ethernet cables.
  2. Plug in ethernet cable to switch and UPS
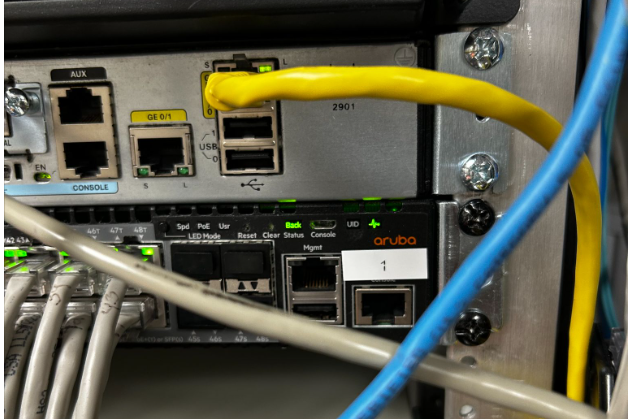
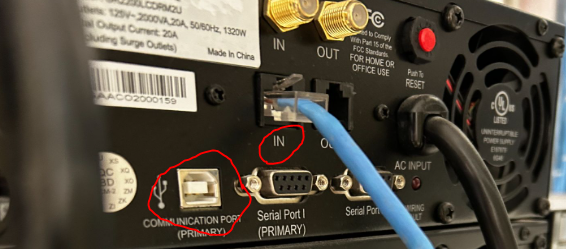
    • The UPS will have an ethernet port labeled, “in”. Plug the first end of ethernet cable into this port.
    • Using the most direct and least obstructive path, plug in the second end of the ethernet cable into the switch. It is absolutely crucial that you do not obstruct the front of a different UPS or run a cable through a slot that a UPS/Switch could fit into.
    • If at all possible, DO NOT, run the cable through existing ethernet cables, but rather run the cable behind them to avoid tangling.
  3. Final Step: Using PowerPlan Personal
    • With the ethernet cables plugged in and PowerPlan Personal opened and properly setup, plug in the USB A to USB B cable into the laptop and the correct UPS port, likely titled communication port. (image below)
    • Next, change the number in the sender name. If it is a single digit, add a 0 in front of the number.
      • Ex. UPS #11 Notification —> UPS #09 Notification
    • Lastly, click “Apply”.  If it applies successfully, move onto the next step.
    • Click “Verify”. If it verifies successfully, move onto the next step.
    • Finally, click “Test”. If it tests successfully, you have finished and may unplug the laptop from the UPS.

JSON issues when securing Llama with Nginx

It looks like your issue might stem from one of the following causes:

Possible Causes and Fixes:

  1. Misconfiguration in Nginx Reverse Proxy

    • If Nginx is improperly handling WebSockets or HTTP requests, it could be modifying or breaking JSON responses from your Llama 2 API.
    • Fix: Ensure your Nginx configuration includes proper proxy settings:
      nginx
      location / {
      proxy_pass http://localhost:PORT; # Replace PORT with your Llama 2 API port
      proxy_set_header Host $host;
      proxy_set_header X-Real-IP $remote_addr;
      proxy_set_header X-Forwarded-For $proxy_add_x_forwarded_for;
      proxy_set_header X-Forwarded-Proto $scheme;

      proxy_buffering off;
      proxy_http_version 1.1;
      proxy_set_header Upgrade $http_upgrade;
      proxy_set_header Connection "Upgrade";
      }

  2. Certbot HTTP-01 Challenge Interference

    • Certbot might have temporarily modified your Nginx config and is interfering with normal operation.
    • Fix: Try restarting Nginx after Certbot finishes:
      nginx
      sudo systemctl restart nginx
  3. Mixed Content Issue (HTTP vs. HTTPS)

    • If the AI server is still using HTTP but Nginx is serving HTTPS, responses might be malformed.
    • Fix: Ensure the Llama 2 backend API is also running with HTTPS or use proxy_redirect:
      nginx
      proxy_redirect http:// https://;
  4. JSON Response Encoding Issue

    • If Nginx is interfering with response headers, ensure JSON content-type is correctly set.
    • Fix: Add:
      nginx
      proxy_set_header Content-Type application/json;

Next Steps

  • Check the Nginx logs:
    nginx
    sudo journalctl -u nginx --no-pager --lines=50
  • Verify Certbot logs for potential misconfigurations:
    bash
    sudo cat /var/log/letsencrypt/letsencrypt.log
  • Try disabling Nginx temporarily and directly accessing the AI server to confirm JSON responses are correct.

Expanding Ubuntu 22.04 Drive Via Terminal

  • Assumptions
    • You need to resize a drive without a GUI.
    • You have made some backup of your VM/Physical drive
  • Notes
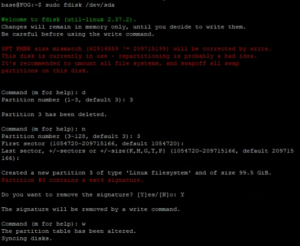
    • I got locked out of my Ubuntu Desktop GUI for this tutorial and have to putty to the machine as shown in the image below.
  • List you disks
    • df -h
      • You will get a large output but you need to look for something similar to this
  • Find the partition that is out of space. (mine was /dev/sda3/)
    • sudo fdisk /dev/sda
  • Delete and remake the partition (YOU WILL NOT LOSE DATA), mine was partition 3
    • d
      • delete a partition
    • 3
      • Partition 3
    • n
      • Make a new partition
    • 3
      • Make it partition 3
    • PRESS ENTER TWICE
      • Specifying the starting and ending blocks. I want the default so I press enter for both questions.
    • Y
      • Yes, delete the signature
    • w
      • Write the changes.
    • Control + C
      • Exit fdisk
  • Resize the file system
    • sudo resize2fs /dev/sda3
  • Verify the changes were made
    • df -h
      • The new size of your file system will be shown.

Docker Management

  • Assumptions
    • You have installed and configured docker using the documentation here.
  • Install Docker Desktop
    • Docker Desktop is a Windows solution to having the docker engine on Windows 10/11 (THIS CAN NOT RUN ON WINDOWS SERVERS) and can be downloaded here.
    • After running the install, there will be a checkbox asking if you want to run it using WSL2, uncheck this as most Windows systems don’t have this downloaded by default and HyperV works just as well.
    • After installing and restarting, move on
  • Install DockStation
    • This is a GUI for creating, managing, and deleting Docker containers on both remote and local Docker Hosts.
    • To install this, go the the web address here and download the Windows executable. Just run the .exe file and click next until the app is installed.
  • DockStation Configuration
    • Now that you have DockStation installed, you need to connect it to your remote server.
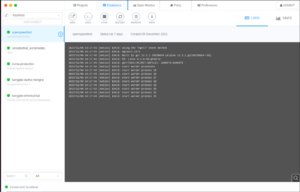
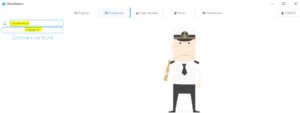
    • To do this go to the “Containers” top and go to the top left and edit the machine it is connected to (changing it from localhost).
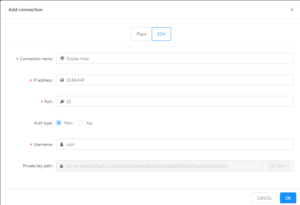
    • You will then add a new connection and log in via “SSH”. You will enter the IP address of your docker host and enter a username that has access to the docker application on that host (I am going to use root).
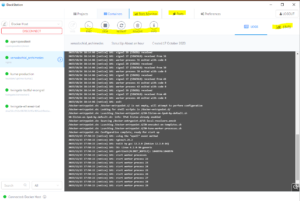
    • You then need to make sure you have the correct connection selected and click “connect” to connect to the Docker instance.
    • Once you log in, you will be able to view your docker machines, create new ones, connect to the shell of these machines, delete them, monitor them, and so on.

Swapping HDD On LSI MegaRAID 9361-8i

  • Assumptions
    • You have powered down the machine (safely of course)
    • The server is unplugged and residual power has been drained.
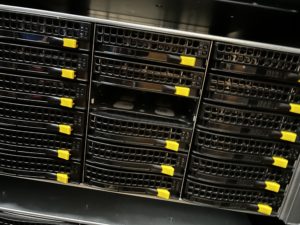
  • Find the broken drive
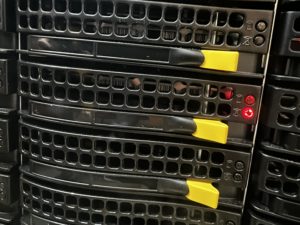
    • This is indicated via the red LED on the front of the drive bays.
      • FLASHING RED = HOT SPARE
      • SOLID RED = BROKEN/BAD HDD
    • Remove the drive from the drive bay and replace it with a drive of the EXACT same model. If it is a different model, it can not be added as a hot spare, only as an “Up Good” drive.
  • Power on the Server
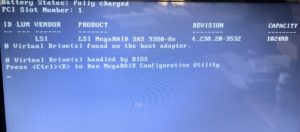
    • As the server powers on, it will conduct tests such as normal POST and gather information on the RAID controller. As the machine powers on, you will eventually come to the following screen after some minutes of booting.
    • Once this screen comes up, press “CTRL + R” to enter the raid controller settings. The screen will look like the following.
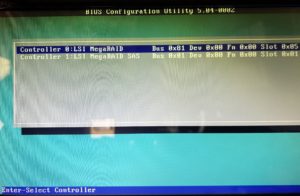
    • Once you get to this screen, press enter to enter the primary RAID controller settings.
  • Configure the drive and add it as a Hot Spare
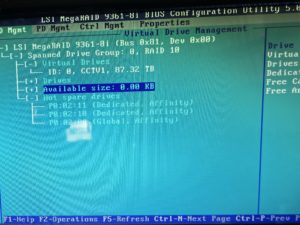
    • Once you are in the RAID controller, it will look somewhat like the following.
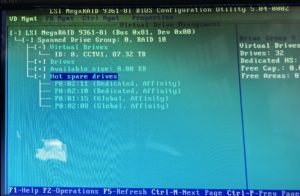
    • As you can see, there are only THREE hot swap drives. We need to add the new drive to act as the fourth spare.
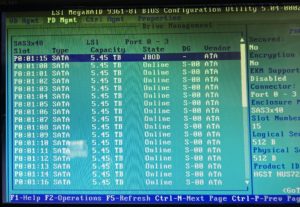
    • To do this, tab over to “PD Mgmt” to see all of the disks. The screen will look as follows.
    • Here you can see a list of all drives connected to the RAID controller. The one in the”JBOD” state is going to be the drive that needs to be changed.
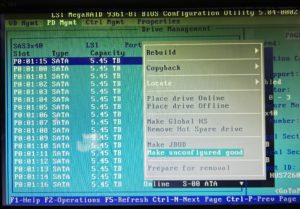
    • To do this, press “F2” while hovering the drive to bring up the options. You will then be presented with the following menu.
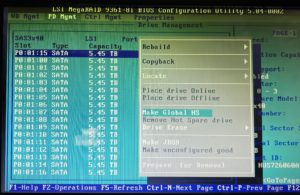
    • In this menu, you will select “Make Unconfigured Good” to change the drive to an “Up Good” state. You will then go back to the menu to make it a Hot Spare.
    • Once you are back to this menu, select “Make Global HS” to make it a Hot Spare for all virtual drives.
    • You can then go back to “VD Mgmt” and expand the “Hot Spare Drives” section to see your new hot spare!
  • Reboot the Server
    • You can now reboot the machine and bring it back to full operation!

Docker Install and Configuration

  •  Assumptions
    • You have an Ubuntu 22.04 Linux server created
      • 4GB of RAM
      • 30GB of Drive Storage
  • Install Docker
    • sudo apt-get update
    • sudo apt-get install ca-certificates curl gnupg
    • sudo install -m 0755 -d /etc/apt/keyrings
    • curl -fsSL https://download.docker.com/linux/ubuntu/gpg | sudo gpg --dearmor -o /etc/apt/keyrings/docker.gpg
      
    • sudo chmod a+r /etc/apt/keyrings/docker.gpg
    • echo \
        "deb [arch=$(dpkg --print-architecture) signed-by=/etc/apt/keyrings/docker.gpg] https://download.docker.com/linux/ubuntu \
        $(. /etc/os-release && echo "$VERSION_CODENAME") stable" | \
        sudo tee /etc/apt/sources.list.d/docker.list > /dev/null
      
    • sudo apt-get update
    • sudo apt-get install docker-ce docker-ce-cli containerd.io docker-buildx-plugin docker-compose-plugin
  • Add Current User to Docker Group
    • By default, only the root user can do docker commands, you need to add your current user to the docker group in order to allow it to run docker commands.
      • sudo groupadd docker
      • sudo gpasswd -a $USER docker
      • newgrp docker
  • Test Docker installation
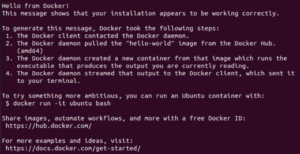
    • docker run hello-world
      • This command runs a test docker container to see if your installation functions normally. The output should look like the image below

Configuring Nginx for HTTPS Redirect

  • NOTES
    • If you already have nginx deployed, skip to the “Add a website for URL redirect” step.
  •  Assumptions
    • You have an Ubuntu 22.04 Linux server created
      • 4GB of RAM
      • 30GB of Drive Storage
  • Prerequisites
    • You have a DNS “A” record redirecting all subdomains to your machine.
      • For instance, if your domain is “example.com”, you need to create an A record of “*” to redirect everything to anysubdomain.example.com.
  • Download openssh (OPTIONAL)
    • This allows the user to ssh into the machine to allow for easier copying and pasting of commands
      • sudo -i
        • This puts the current terminal as a super user (can run commands as an admin).
      • apt-get update
        • Updates the current list of Linux packages.
      • apt-get upgrade
        • Upgrades all of the packages/updates the actual software
      • apt-get install openssh-server
        • This installs openssh so you can ssh to the Linux machine
    • Connect to the Linux machine via SSH (use putty or the cmd)
  • Install nginx
    • apt install nginx
      • This installs the nginx software and engine
    • systemctl status nginx
      • this will check the status of nginx, ensuring the it is running
  • Add a website for URL redirect
    • cd /etc/nginx/sites-available
    • nano yourwebsite.example.com
      • You will want this to actually be the URL you are redirecting. For instance, test.nationaltrail.us. “test” is the subdomain and “nationaltrail.us” is the domain we own.
    • Add the following configuration to the file
      • server {
        server_name test.nationaltrail.us;location / {
        proxy_pass http://10.10.8.112; # Point to test web server
        proxy_set_header Host $host;
        proxy_set_header X-Real-IP $remote_addr;
        proxy_set_header X-Forwarded-For $proxy_add_x_forwarded_for;
        }
        }

        • This redirects “test.nationaltrail.us” to “http://10.10.8.112”
    • Link sites-available to sites-enabled
      • ln -s /etc/nginx/sites-available/test.nationaltrail.us /etc/nginx/sites-enabled
        • This creates a link from sites-available to sites-enabled to allow nginx to start redirecting/have access to the configuration
    • Test the configuration
      • nginx -t
        • This should have an output such as “the configuration is OK”
    • Restart the nginx service
      • systemctl reload nginx
    • You should now ab able to go to “test.nationaltrail.us” to go to the website located at “10.10.8.112”
  • Add Certbot and secure the site
    • At this point, you are only redirecting traffic, not adding an SSL certificate. This will add encryption to secure the site.
    • Install certbot and the nginx plugin
      • apt install certbot python3-certbot-nginx
    • Secure your website
      • certbot –nginx -d test.nationaltrail.us
    • Go through the installation process. This includes adding a notification email for certificate expiration AND choosing the option for REDIRECTING traffic to HTTPS. This is the second option if you are prompted for it.
    • Restart nginx
      • systemctl reload nginx
  • Connect to your website! It should be secured unless the web app requires further proxy configuration (refer to the webpages documentation for this possibility).

Connecting to a Docker Container Using Ubuntu Terminal

  • NOTE: You can do other commands such as copy files from the container to your VM, install tools in the container, and anything that can be done on a regular Ubuntu install. For more information, look in the DOCKER DOCUMENTATION.
  •  Assumptions
    • You are using Ubuntu/Debian-based OS
    • You have Docker installed
    • You have a running container
    • You have access to the docker environment
  • Get the docker ID and list the containers
    • Open Ubuntu Terminal
      • docker ps
        • This allows you to get a list of all docker containers
    • The docker ID is the first string of numbers and letters before your container
    • Enter the docker container
      • docker exec -it <your container ID> bash
        • docker exec -it 175cb158268e bash
  • You can now execute commands in the container just as you could in a regular Ubuntu Server.

Solving Windows 10 Update Issues

Here at school, and at my home, we use an SSD for the OS and programs, and a traditional HDD for user files and data.  This requires a registry edit before a user logs on, and has worked great to save SSD space for those items that need SSD speed.

However, it appears to cause issues with major updates in Windows.  While minor updates happen frequently, major ones always fail.  I needed the major upgrade to 21H2 to make Starfall work, so it was a priority!  🙂

To fix this issue I had to do the following.

  1.  Logon with the admin account that was originally setup with windows.  This account is stored in the User folder where windows was installed.
  2. Undo the registry hack to put user folders on the D: Drive.
    1. [HKEY_LOCAL_MACHINE\SOFTWARE\Microsoft\Windows NT\CurrentVersion\ProfileList] should be returned to %SystemDrive%\Users
  3. Run the following in an administrator command prompt.  In short, it repairs the Windows installation folder.
    1. DISM.exe /Online /Cleanup-image /Restorehealth
  4. Now I ran an upgrade from a flash drive with the current Windows release…and it worked!

Hope this helps anyone else with Windows upgrade issues, or more importantly, Starfall issues!