This overview is intended for other tech departments that host their own school Moodle servers. LTS 4.1 got out of security support this fall and we are migrating to LTS 4.5. We ONLY use LTS versions and only upgrade when the existing one will fall out of support on the upcoming school year.
- Ensure your existing Moodle server has no issues with upgrading.
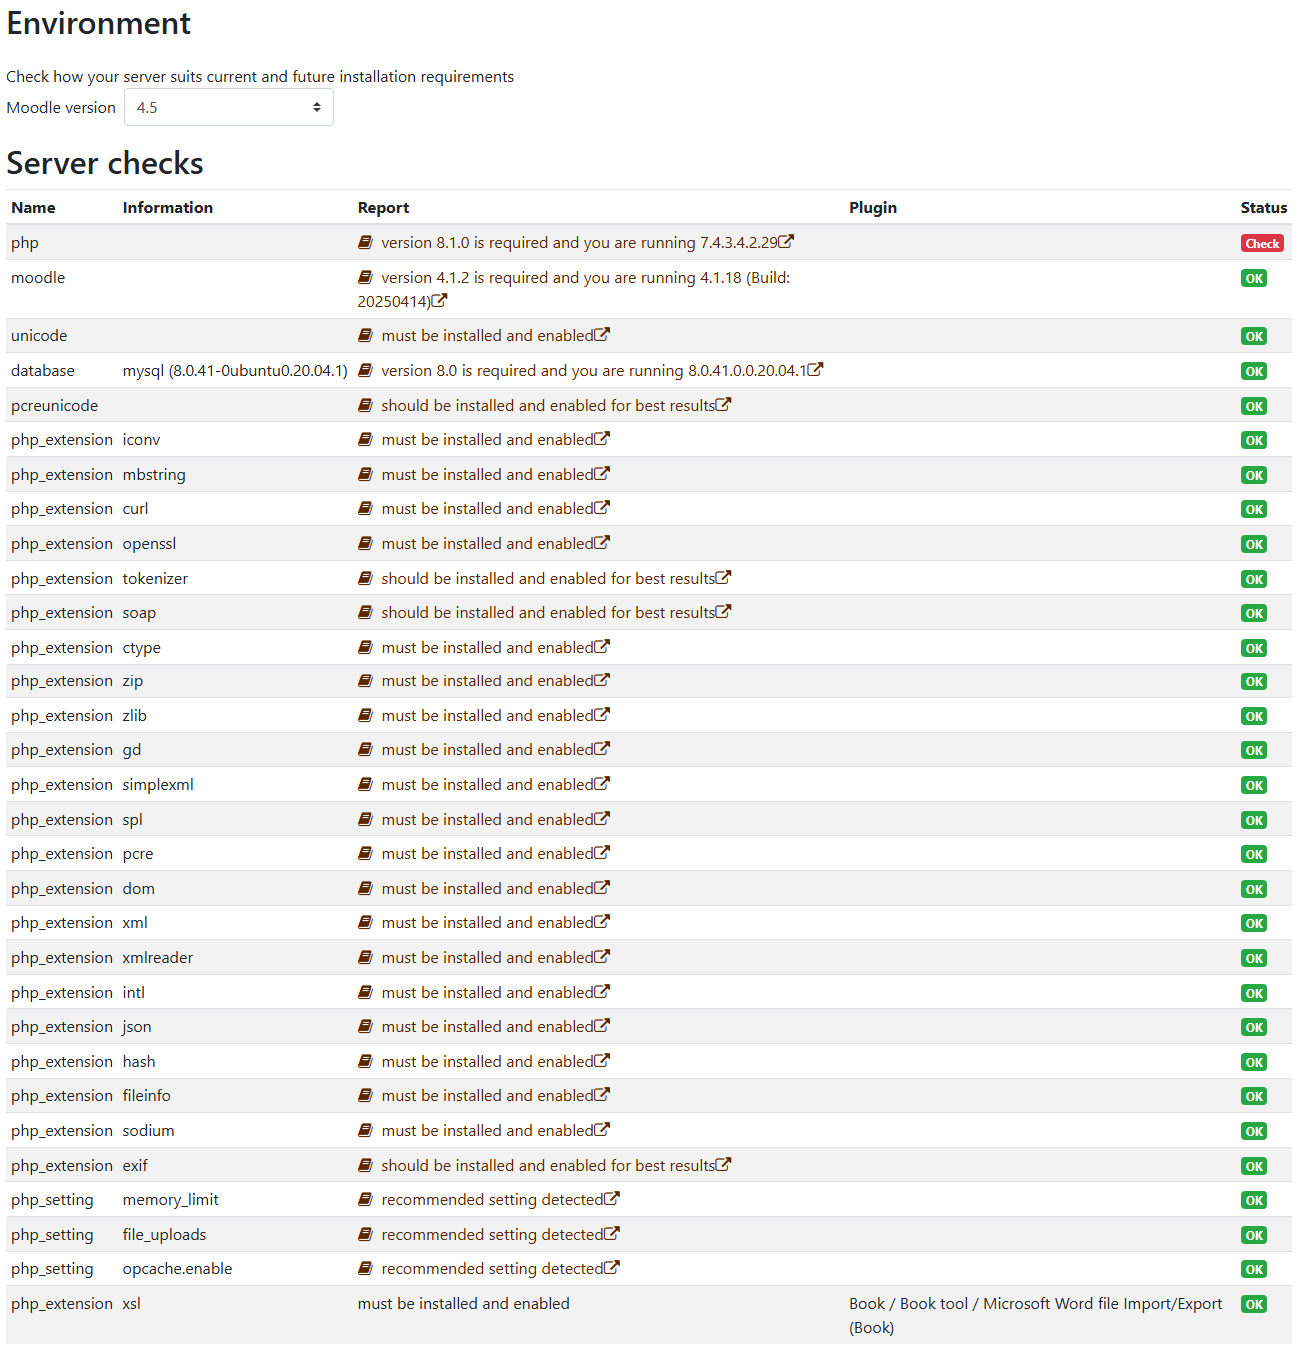
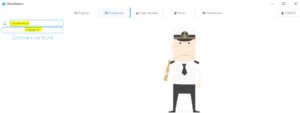
- Go to Site administration -> Server -> Environment
- Change the Moodle version to the one indended after the upgrade
- Fix any issue THAT DO NOT require major changes

- At the point of this screenshot I already deleted the assignment2 mod. The only thing left is PHP 8.1.0 and this IS a major change that I WILL NOT make on my running production server.
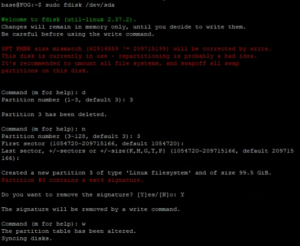
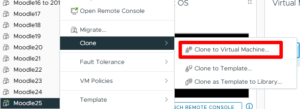
- Copy your entire existing production server to a new machine
- In my case I do a VM Clone to a new M.2 SSD for the new year.
- I keep the old M.2s in the server in case I need to recover old grades, projects, assignments…
- I use a new M.2 every year. I found the writes on a Moodle installation wear out an SSD and I had one fail previously when I tried to use the same drive for 2 years, and it is $200.
- I now have a 1:1 copy of the existing production server that I can break to my hearts content without my staff having a coronary.
- Turn off the NIC on the new server while you do the following:
- I delete the VM NIC and add a new one to ensure it is a new address and cannot conflict with the existing server. But it is still disconnected until I am ready.
- Log onto the new Moodle and be sure to change the database prefixes and config file to reflect the new database. You can leave them the same, but that causes issues if you have them both online at the same time.
- change /etc/host and /etc/hostname to new server name
- Change config.php to 127.0.0.1
- Open PhPMyAdmin
- Open Moodle
- Change the prefix from m25 to m26 (Moodle 2025 -> Moodle 2026)
- Add the Moodle Upgrade Key to prevent accidental upgrades.
- $CFG->upgradekey = ‘put_some_shared_secret_here’;
- Turn on your NIC to provide the server Internet access
- Update your server
- apt-get update
- apt-get upgrade
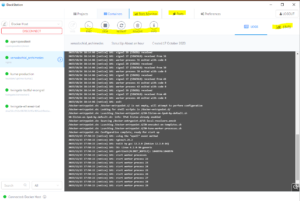
- Logon to your Moodle server and check Moodle Update
- Go to Site administration -> Server -> Environment
- Change the Moodle version to the one indended after the upgrade
- Now we will fix major updates like PHP 7.4 to 8.1
- add-apt-repository ppa:ondrej/php
- apt-get update
- apt-get install php8.1
- Install the Moodle List of Dependencies
- apt install php8.1-cli php8.1-xml php8.1-gd php8.1-curl php8.1-mysql php8.1-ldap php8.1-zip
- apt-get install libapache2-mod-php8.1 php8.1-pspell php8.1-curl php8.1-gd php8.1-intl php8.1-mysql php8.1-xml php8.1-xmlrpc php8.1-ldap php8.1-zip php8.1-soap php8.1-mbstring
- systemctl restart apache2
- a2dismod php*
- a2enmod php8.1
- You must now make the Moodle changes to the PHP environment
- gedit /etc/php/8.1/apache2/php.ini
- Find “post_max_size”
- Change to 2000M
- Find “upload_max_filesize”
- Change to 2000M
- Find “max_execution_time”
- Change the value to 600
- Find “max_input_vars”
- Uncomment the line
- Change the value to 5000
- Find “mysqli.allow_local_infile = On”
- Uncomment the line
- Find “post_max_size”
- gedit /etc/php/8.1/apache2/php.ini
- Upgrade to Current LTS Ubuntu Version if near EOL on current release
- lsb_release -a
- sudo apt update && sudo apt upgrade -y && sudo apt dist-upgrade -y
- sudo apt install update-manager-core
- sudo do-release-upgrade
- sudo do-release-upgrade -d
- To restart mysql
- invoke-rc.d mysql start
- Update Moodle to 4.5+
- Download and extract tgt
- Move changes folder into the moodle folder
- Start Upgrade
- It will be missing all Moodle Addons, printscreen this page to ensure we gent them later