- Assumptions
- You already have a vCenter virtual environment with permission to create virtual machines.
- This environment is fully licensed.
- You have prior knowledge of how to create a virtual machine (Can make a Windows Server 2022 machine).
- You already have a vCenter virtual environment with permission to create virtual machines.
- Prerequisites
- On Personal Machine
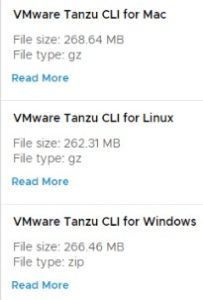
- Download and install the Tanzu Grid CLI tools from the VMWare website
- Download, install, and open Docker Desktop on your machine
- On vCenter
- You need to download the Tanzu base image (OVA file) from the VMware website, upload it to your server and convert it to a template. (When you do the initial setup on the Tanzu you will know what version you need)
- On Personal Machine
- Create an SSH Public key on your vCenter environment
- Generate a public key using Puttygen or other key-generation softwares
- SSH to the vCenter server using Putty or another SSH service
- Enter the following commands and change the following lines
- vi /etc/ssh/sshd_config
- CHANGE: PermitRootLogin no” to “PermitRootLogin yes”
- vi /etc/ssh/keys-root/authorized_keys
- Add the key you created
- /etc/init.d/SSH restart
- vi /etc/ssh/sshd_config
- Do the Tanzu Installation
- Enter the following commands into the command line
- tanzu init
- tanzu mc create -u
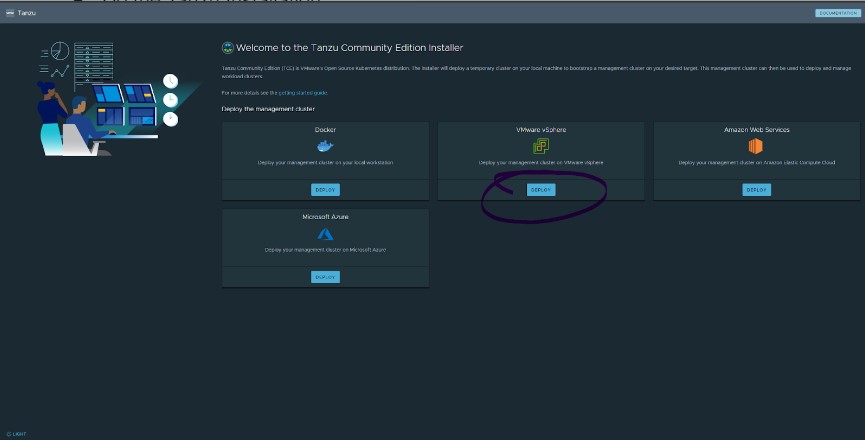
- You will be presented with a web GUI for the Tanzu installation
- Select “Deploy” under the VMware vSphere option
- Under the IaaS Provider Option
- IP or FQDN
- Enter the IP address/DNS name of your virtual environment
- Username
- Enter the username of an administrator account for vCenter
- Password
- The password to the account name you provided
- Disable verification
- Unchecked
- SSL Thumbprint Verification
- Check “Disable Verification”
- Click Connect
- Select the datacenter you have set up in vCenter
- SSH Public Key
- Enter the same public key you put in your vCenter config files
- IP or FQDN
- Under Management Cluster Settings Tab
- Deployment
- Select the desired instance type; I used small
- Management Cluster Name
- Give your new cluster a name
- Control Plane Endpoint Provider
- Kube-vip (for simplicity’s sake)
- Worker Node Instance Type
- I used small
- Control Plane Endpoint
- Give your cluster an unused IP address
- Deployment
- VMware NSX Advanced Load Balancer
- LEAVE THIS BLANK
- Metadata
- LEAVE THIS BLANK
- Resources
- VM Folder
- Select the folder that you want your VMs to be a part of.
- Datastore
- Select the datastore you want your machines to be stored
- VM Folder
- Kubernetes Network
- Network Name
- Select the port group/vCenter network you want to use.
- Cluster Service CIDR
- Leave Default
- CLUSTER SERVICE CIDR
- 100.64.0.0/13
- CLUSTER POD CIDR
- 100.96.0.0/11
- CLUSTER SERVICE CIDR
- Leave Default
- Network Name
- Identity Management
- DISABLE THE CHECKBOX TO BLANK THIS OUT
- OS Image
- Select the template you made earlier in the installation process
- Select “Review Configuration” and finish the installation
- Enter the following commands into the command line
- Deploy an Azure DevOps machine
- Create a Windows Server VM (I used 2022)
- Download the Azure DevOps Server Tools
- This is a very typical setup wizard (basically just clicking next 5 times). It will install Java and SQL for you if you do not have them already.
- After an uneasy amount of time, the installation will be complete (you may need to restart). You can then open the Azure DevOps Server Administration Console.
- You can then connect to the web GUI through a web browser
- http://azure-devops OR http://SERVER _IP_ADDRESS
- You can then connect to the web GUI through a web browser
- The username and password are the same as the Admin user account on the Windows Server 2022 server
- You can add other users in the administration console under the “Application Tire” tab under “Administration Console Users”
- Create a Windows Server VM (I used 2022)
- Connecting Everything Together – The Finale
- In the Azure-DevOps web GUI, go to “Collection Settings” located at the bottom left.
- Go to the “Agent Pools” tab toward the bottom left
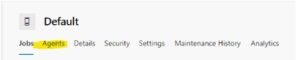
- Select the Default Agent pool
- Select “New Agent” at the top right
- Follow the instructions prompted to you on the screen (downloading a zip file, making a few directories, and such).
- I HAVE USED THE SAME 2022 SERVER FOR BOTH HOSTING THE DEVOPS WEBSITE AND THE AGENT TOOLS.
- Run “config.cmd”
- Enter Server URL
- https://AZURE_DEVOPS_IP_ADDRESS
- Press enter for the integrated authentication type
- Run this as a service so it starts when the machine starts
- Enter Server URL
- Run “config.cmd”
- Go to the “Agents” tab in the Default Agent Pool section
- There should now be an Agent that is currently online
- Connect the Kubernetes cluster to a pipeline
- In the Azure DevOps console, create a new Project on the main screen
- Go to the “pipelines” selection on the left
- Select “Environments”
- Create Environment
- Give it a name
- Select Kubernetes as the Resource
- Provider
- Leave Default
- Cluster Name
- This will be what you named your cluster when you created the Tanzu Cluster
- Namespace
- You can use the “default” namespace for simplicity’s sake
- Server URL
- Secret
- In a command line interface, connect to your Tanzu Cluster
- tanzu init
- tanzu login
- Select your cluster and hit enter
- Create a new service account
- Download the file located HERE
- Change your directory to your downloads folder in the command line
- Execute a command to run the YAML file
- kubectl apply -f azure-devops-service-account.yaml
- Get the token for the service account
- kubectl get serviceAccounts <service-account-name> -n <namespace> -o=jsonpath={.secrets[*].name}
- Use the token to get the secret
- kubectl get secret <service-account-secret-name> -n <namespace> -o json
- Replace the <Service Account Secret Name> with the token you got from the previous command
- kubectl get secret <service-account-secret-name> -n <namespace> -o json
- Enter the output you got from that in the Azure DevOps “Secret” textbox.
- In a command line interface, connect to your Tanzu Cluster
- Check the “Accept untrusted certificates” checkbox
- Finish by clicking “Validate and Create”
- Provider
- In the Azure DevOps console, create a new Project on the main screen