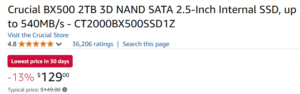
Fastest CPU Option AMD Ryzen 9 7950X Review


Once I bought my MSI MAG B650M MORTAR motherboard I wanted to get the fastest possible CPU which is the AM5 AMD Ryzen 9 7950X CPU. This CPU was the best decision and worked better than I was expecting.  I found this CPU on Amazon and it was $531.91. This price could change depending on the market and sales. At first, I was skeptical because of the price but after installing it I knew I made the right decision. I bought this CPU to be fast and be able to run any game and it is capable of that. When first researching this CPU the most impressive part of the product was the passmark rating.  This CPU’s passmark rating was in incredible 63101. Please note that this passmark rating can change if someone uploads a new rating. This rating as well as all my other information was found on the passmark CPU website where you can compare it to other CPU’s. I decided to run farming simulator 19 and it ran better than any other CPU I’ve ever had. It didn’t lag at all even with all of the mods I use that usually slows my game.

This CPU has an amazing clock speed of 4.5 GHz as well as having 16 cores and 32 threads. It also has and L1 instruction and data of 16 x 32 KB.  It has a L2 rate of 16 x 1024 as well as a L3 rate of 64 MB. This all together makes its amazing cache which runs my computer beautifully.

Note:  This review is part of a classroom project.

Works Cited:

“AMD Ryzen™ 9 7950X 16-Core, 32-Thread Unlocked Desktop Processor.” Amazon.com, https://www.amazon.com/dp/B0BBHD5D8Y?tag=cpubenchmark-20&linkCode=osi&th=1&psc=1. Accessed 23 January 2024.

“PassMark – AMD Ryzen 9 7950X – Price performance comparison.” CPU Benchmarks, https://www.cpubenchmark.net/cpu.php?cpu=AMD+Ryzen+9+7950X&id=5031. Accessed 23 January 2024.


AMD Ryzen 9 7900X

This CPU works perfectly with my gaming motherboard. It is  a really good for being a  best value CPU. The price of AMD Ryzen 9 7900X is on Newegg for $406.79 as of January 22, 2024. I feel like this is at a very good price for a being a best value CPU because it give you everything that you would need. This CPU helps improves my  gameplay  of  Cyberpunk2077.  

The Ryzen 9 7900X CPU is made by AMD. This CPU’s socket is a AM5. The good thing about this CPU is that it has a L1 instruction cache is 12 x 32 KB, L1 Data cache is 12 x 32 KB, L2 cache is 12 x 1024 KB, and the L3 cache is 64 MB. The typical  thermal design power or TDP is 170 W. The CPU has 12 cores and 24 threads. The clockspeed of the CPU is 4.7 GHz and the turbo speed 5.6GHz. The PassMark rating is 52035.References:

PassMark

Newegg

Note:  This review is part of a classroom project.

Ryzen 5 7600X Review

Today we are reviewing the specifications on the Ryzen 5 7600X CPU. It is a Ryzen AMD CPU. Here is a linked photo to the official website to buy.

AMD RYZEN™ 5 7600X Processor

It’s specifications are as follows:

  • # of CPU Cores: 6
  • # of Threads: 12
  • Max. Boost Clock: Up to 5.3GHz
  • Base Clock: 4.7GHz
  • Total L1 Cache: 384KB
  • Total L2 Cache: 6MB
  • Total L3 Cache: 32MB
  • Default TDP: 105W
  • CPU Socket: AM5
  • *OS Support: Windows 11 – 64-Bit Edition
    Windows 10 – 64-Bit Edition
    RHEL x86 64-Bit
    Ubuntu x86 64-Bit
It’s passmark score is 26737 with a low margin for error and ranked 317 on the list. I thank you for your time today if you decided to buy this CPU and motherboard combo thank you and have an amazing day
Works cited:

Shop, https://shop-us-en.amd.com/. Accessed 25 January 2024.

“PassMark – AMD Ryzen 7 5700X – Price performance comparison.” CPU Benchmarks, https://www.cpubenchmark.net/cpu.php?id=4814&cpu=AMD+Ryzen+7+5700X. Accessed 25 January 2024.

Note:  This review is part of a classroom project.

AMD Ryzen 5 7600x Review

AM4 was a success with it being continually used since 2016 with customers like myself being extremely happy with the performance of the AM4 lineup but now its time for a new area of CPUs. With AM5’s socket and its Zen 4 CPU microarchitecture, we can expect even better performance than the previous generation, and the Ryzen 5 7600x does not let down the expectations.

The Ryzen 5 7600x has 6 cores and 12 threads, and with a base clock of 4.7 GHz and a boost clock of 5.3 GHz, this CPU gives its predecessor, the Ryzen 5 5600x, a run for its money. The Ryzen 5 7600x has 384KB of L1 Cache, 6MB of L2 Cache, and 32MB of L3 Cache, which provides an ideal amount of core memory that allows you to do all the gaming and workstation tasks you need. This allows me to play Farming Simulator 22, Fortnite, Flight Simulator, and great FPS without having to buy the most expensive GPU on the market.

With a PassMark score of 28,650, and a rank of 273, this CPU nears the top 8 percent of CPUs on the market. My personal experience so far has been great with this CPU and I only have a couple of bad things to say about it. First of all, unfortunately, this CPU does not come with a cooler for the $228.95 that it costs on Amazon right now. It kinda stinks comparing it to Ryzens 3rd gen CPUs that normally came with a cooler when bought new. In conclusion, I would give this CPU a 4.5 out of 5 stars compared to the 4.6-star rating that it has on Amazon because of its ultimate performance, but if you use an AM4 chip right now, I would suggest waiting a little longer before investing in the AM5 socket so maybe you could snatch a CPU like this at a little better price.

Note: This review is part of a classroom project.

AMD Ryzen 5 7600X CPU

The AMD Ryzen 5 7600X is one of the best-value CPUs for gamers. The CPU works with motherboards that support Ryzen 7000 series CPUs with an AM5 socket. The Ryzen 5 7600X received a benchmark rating of 28,637. The Ryzen 5 7600X has 6 cores and has a  clock speed of 4.7GHz. The max boost clock of the CPU is up to 5.3GHz. This CPU has great single-thread performance that is good for gaming. The CPU is available for purchase on AMD for $229 as of 1/25/24.

AMD RYZEN™ 5 7600X Processor

AMD Ryzen 9 7900X – CPU Review

The AMD Ryzen 9 7900X is an excellent CPU. It is a good CPU for a Business motherboard. There are different places where you can buy it. The 4 prices I will show you are from Amazon, New Egg, Best Buy, and from the AMD website.

Amazon: It Costs $549.00. It has a 4.7-star rating on Amazon.

New Egg: It cost $548.99. It has a 4.8-egg rating on New Egg.

Best Buy: It cost $549.99. It has a 4.8-star rating on Best Buy.

AMD Website: It cost $549.00.  It does not have a rating on there website.

The specifications of this CPU are really good with the most important being:

  • Socket: AM5
  • Clockspeed: 4.7 GHz
  • Cores: 12
  • Threads: 24
  • Cache per CPU Package:
    • L1 Instruction Cache: 12 x 32 KB
    • L1 Data Cache: 12 x 32 KB
    • L2 Cache: 12 x 1024 KB
    • L3 Cache: 64 MB

Its Passmark rating is based on value. It is the best value CPU for a motherboard such as the ASRock B650E PG RIPTIDE WIFI Motherboard has a combined rating of 52041 and a single thread rating of 4284.

Note: This review is part of a classroom project.

References:

https://www.cpubenchmark.net/cpu.php?cpu=AMD+Ryzen+9+7900X&id=5027


Expanding Ubuntu 22.04 Drive Via Terminal

  • Assumptions
    • You need to resize a drive without a GUI.
    • You have made some backup of your VM/Physical drive
  • Notes
    • I got locked out of my Ubuntu Desktop GUI for this tutorial and have to putty to the machine as shown in the image below.
  • List you disks
    • df -h
      • You will get a large output but you need to look for something similar to this
  • Find the partition that is out of space. (mine was /dev/sda3/)
    • sudo fdisk /dev/sda
  • Delete and remake the partition (YOU WILL NOT LOSE DATA), mine was partition 3
    • d
      • delete a partition
    • 3
      • Partition 3
    • n
      • Make a new partition
    • 3
      • Make it partition 3
    • PRESS ENTER TWICE
      • Specifying the starting and ending blocks. I want the default so I press enter for both questions.
    • Y
      • Yes, delete the signature
    • w
      • Write the changes.
    • Control + C
      • Exit fdisk
  • Resize the file system
    • sudo resize2fs /dev/sda3
  • Verify the changes were made
    • df -h
      • The new size of your file system will be shown.

Docker Management

  • Assumptions
    • You have installed and configured docker using the documentation here.
  • Install Docker Desktop
    • Docker Desktop is a Windows solution to having the docker engine on Windows 10/11 (THIS CAN NOT RUN ON WINDOWS SERVERS) and can be downloaded here.
    • After running the install, there will be a checkbox asking if you want to run it using WSL2, uncheck this as most Windows systems don’t have this downloaded by default and HyperV works just as well.
    • After installing and restarting, move on
  • Install DockStation
    • This is a GUI for creating, managing, and deleting Docker containers on both remote and local Docker Hosts.
    • To install this, go the the web address here and download the Windows executable. Just run the .exe file and click next until the app is installed.
  • DockStation Configuration
    • Now that you have DockStation installed, you need to connect it to your remote server.
    • To do this go to the “Containers” top and go to the top left and edit the machine it is connected to (changing it from localhost).
    • You will then add a new connection and log in via “SSH”. You will enter the IP address of your docker host and enter a username that has access to the docker application on that host (I am going to use root).
    • You then need to make sure you have the correct connection selected and click “connect” to connect to the Docker instance.
    • Once you log in, you will be able to view your docker machines, create new ones, connect to the shell of these machines, delete them, monitor them, and so on.

Swapping HDD On LSI MegaRAID 9361-8i

  • Assumptions
    • You have powered down the machine (safely of course)
    • The server is unplugged and residual power has been drained.
  • Find the broken drive
    • This is indicated via the red LED on the front of the drive bays.
      • FLASHING RED = HOT SPARE
      • SOLID RED = BROKEN/BAD HDD
    • Remove the drive from the drive bay and replace it with a drive of the EXACT same model. If it is a different model, it can not be added as a hot spare, only as an “Up Good” drive.
  • Power on the Server
    • As the server powers on, it will conduct tests such as normal POST and gather information on the RAID controller. As the machine powers on, you will eventually come to the following screen after some minutes of booting.
    • Once this screen comes up, press “CTRL + R” to enter the raid controller settings. The screen will look like the following.
    • Once you get to this screen, press enter to enter the primary RAID controller settings.
  • Configure the drive and add it as a Hot Spare
    • Once you are in the RAID controller, it will look somewhat like the following.
    • As you can see, there are only THREE hot swap drives. We need to add the new drive to act as the fourth spare.
    • To do this, tab over to “PD Mgmt” to see all of the disks. The screen will look as follows.
    • Here you can see a list of all drives connected to the RAID controller. The one in the”JBOD” state is going to be the drive that needs to be changed.
    • To do this, press “F2” while hovering the drive to bring up the options. You will then be presented with the following menu.
    • In this menu, you will select “Make Unconfigured Good” to change the drive to an “Up Good” state. You will then go back to the menu to make it a Hot Spare.
    • Once you are back to this menu, select “Make Global HS” to make it a Hot Spare for all virtual drives.
    • You can then go back to “VD Mgmt” and expand the “Hot Spare Drives” section to see your new hot spare!
  • Reboot the Server
    • You can now reboot the machine and bring it back to full operation!

Docker Install and Configuration

  •  Assumptions
    • You have an Ubuntu 22.04 Linux server created
      • 4GB of RAM
      • 30GB of Drive Storage
  • Install Docker
    • sudo apt-get update
    • sudo apt-get install ca-certificates curl gnupg
    • sudo install -m 0755 -d /etc/apt/keyrings
    • curl -fsSL https://download.docker.com/linux/ubuntu/gpg | sudo gpg --dearmor -o /etc/apt/keyrings/docker.gpg
      
    • sudo chmod a+r /etc/apt/keyrings/docker.gpg
    • echo \
        "deb [arch=$(dpkg --print-architecture) signed-by=/etc/apt/keyrings/docker.gpg] https://download.docker.com/linux/ubuntu \
        $(. /etc/os-release && echo "$VERSION_CODENAME") stable" | \
        sudo tee /etc/apt/sources.list.d/docker.list > /dev/null
      
    • sudo apt-get update
    • sudo apt-get install docker-ce docker-ce-cli containerd.io docker-buildx-plugin docker-compose-plugin
  • Add Current User to Docker Group
    • By default, only the root user can do docker commands, you need to add your current user to the docker group in order to allow it to run docker commands.
      • sudo groupadd docker
      • sudo gpasswd -a $USER docker
      • newgrp docker
  • Test Docker installation
    • docker run hello-world
      • This command runs a test docker container to see if your installation functions normally. The output should look like the image below