SP 1TB SSD 3D NAND A55 SLC Cache Performance Boost SATA III 2.5″ 7mm

The SP 1TB SSD NAND is one of the greatest SSDs money can buy for the price of $47.97, and being it is 1TB it is worth getting of course. It’s still an SSD, so it has a limited life; however, it has a 3-year limited warranty, it might not be the best warranty but for it’s price and amount of space it is a extremely good choice for gaming off of while being a very small and compacted drive, yes a hard drive would hold more but they also take much more space and run slower when choosing a drive either hard drive or SSD you ether have a drive that is vulnerable to shaking but holds tones of data but runs slow or a SSD that runs fast can survive a shake or a drop but can die faster than the hard drive and hold less data but over all for this SSD it is the best for it’s price.

citations-

https://www.amazon.com/Silicon-Power-Performance-Internal-SP001TBSS3A55S25/dp/B07B4G19X3?th=1


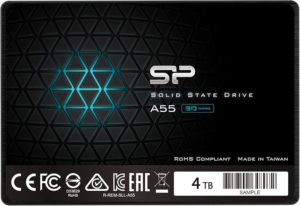
SP A55 Solid State Drive 4TB

Fast and Efficient

The SP A55 uses a SATA III 6Gb/s interface, which allows it to reach read speeds up to 560MB/s and write speeds up to 530MB/s. This means your computer can start up faster, open programs quickly, and transfer files in less time.

Large Storage Capacity

With 4TB of space, this SSD can hold thousands of photos, videos, games, or other files. It’s a good fit for gamers, video editors, students, or anyone with a lot of data.

Strong and Reliable

Since SSDs don’t have moving parts like old hard drives, they are more durable and less likely to fail. The SP A55 also has features that protect your data and help the drive last longer, like bad block management and wear-leveling technology.

Affordable for Its Size

One of the best things about the SP A55 is that it offers a lot of storage at a reasonable price. It’s a smart pick for people who want more space and faster speeds without spending too much money.

Final Thoughts

The SP A55 4TB SSD is a strong choice if you need more storage and better performance. It’s reliable, fast, and affordable. Whether you’re upgrading an older computer or just need more space, this SSD is worth considering.

Check out the SP A55 on Silicon Power’s official site

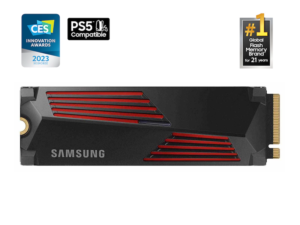
YOU NEED THE CRUCIAL – P310 1TB SSD, IT IS THE BEST HARD DRIVE YOU WILL EVER NEED

In M.2 form and at a fast read and write speed of 7100MBs/6000MBs it is really quick. It also has a single TB with a two TB option. There is as well an option for a heat sink if you don’t want to worry about to much heat being produced.  I personally used this in my computer and my downloads went quicker than my old hard drive.

In terms of specifications it can hold from 500GB, 1TB, or 2TB. It may also include an optional heat sink as well and can go into 2280 and 2230 form factors. It also has QLC SATA form type.

If this hard drive was put inside of a gladiatorial arena with other hard drives it would earn its freedom. I mean the darn thing has a 5 star rating on Best Buy. I would say If you are a gamer or someone running a business I would 100% suggest you get this hard drive.

Note:  This review is part of a classroom project.


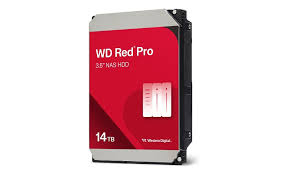
Western Digital Red Pro 8TB

Western Digitals Red Pro NAS Hard Drive has been one of my favorite hard drives so far, especially the capacity of 8TB and a speed of 7200 RPM this can store most things I can think of but what I put on mine is games I don’t play as often, pictures, videos, movies etc you can use this hard drive for anything and i’m sure that it will surprise you the specs are the following:

Size:”3.5

Storage: 8TB

TLC? 

Speed: 7200RPM

Cache: 256MB

Current Price:$226.90 Normal Price: $239.99

This hard drive is state of the art and very good for gamers or any place with servers

this is a classroom project by Evan Zurwell


Crucial BX500 2TB 3D NAND SATA 2.5-Inch Internal SSD, up to 540 MB/s – CT2000BX500SSD1 is awesomeness

The Crucial BX500 2TB 3D NAND SATA 2.5-Inch Internal SSD (CT2000BX500SSD1) is a pretty awesome budget-friendly upgrade for users seeking improved speed and reliability over traditional hard drives.

With read speeds up to 540 MB/s and write speeds of 500 MB/s, it offers a noticeable boost in performance for tasks like booting up, loading applications, and transferring files. Its 2TB capacity provides ample storage for most users, while 3D NAND technology makes for better performance and durability.

 the BX500 delivers solid value with its shock resistance, 720 TBW endurance rating, and a 3-year warranty. It’s an excellent choice for those looking for reliable storage at an affordable price, making it ideal for both laptops and desktops.

  • Capacity: 2 terabytes (TB)​
  • Form Factor: 2.5-inch (7mm height)
  • Interface: SATA III (6Gb/s)​
  • Sequential Read Speed: Up to 540 megabytes per second (MB/s)​
  • Sequential Write Speed: Up to 500 MB/s​
  • Endurance: 720 terabytes written (TBW)
  • Warranty: 3-year limited warranty

price: $129.00

links:

Citation:


corsair is awesomeness

The CORSAIR Vengeance RGB DDR5 RAM 32GB (2x16GB) 7200MHz CL34 is an absolute game-changer for your PC build. This RAM is like strapping rocket boosters to your system, providing a crazy boost in performance with its blazing 7200MHz speed and ultra-low CL34 latency.

Whether you’re gaming, streaming, or rendering, you can feel the difference in responsiveness and smoothness—everything runs like it’s on fire. The RGB lighting adds that extra flare to your rig, making it look as fast as it feels. It’s not just about looks though; the Intel XMP support means effortless overclocking, and iCUE compatibility gives you full control over the lighting, ensuring your system’s aesthetic is on point.

As for stability, it’s rock solid, with Corsair’s reputation for quality ensuring you’re running at peak performance without any hiccups. If you’re building a high-performance rig, this 32GB kit is an absolute must-have, providing the right balance of speed, capacity, and style to elevate your system to the next level.

  • Capacity: 32GB (2 x 16GB modules)

  • Memory Type: DDR5

  • Speed: 7200MHz

  • CAS Latency: CL34

  • Voltage: 1.40V

  • Form Factor: DIMM (Desktop)

$149.99 on amazon

https://www.amazon.com/CORSAIR-VENGEANCE-7200MHz-Compatible-

CORSAIR Vengeance RGB DDR5 RAM 32GB (2x16GB) 7200MHz CL34 Intel XMP iCUE Compatible Computer Memory – Black (CMH32GX5M2X7200C34). Amazon, www.amazon.com/CORSAIR-VENGEANCE-7200MHz-Compatible-Computer/dp/B0BLYLPC9L. Accessed 28 Mar. 2025.

“Vengeance Gaming Computers.” Corsair, www.corsair.com/us/en/c/gaming-computers/vengeance. Accessed 28 Mar. 2025.

http://wordpress.nationaltrail.k12.oh.us/ittech/2025/03/28/corsair-is-awesomeness/

Install RSAT on Windows Server 2019 & 2022

There are two options on how to install Remote Server Administration Tools on Windows Server 2019. But before starting, there’s a thing you need to know, that is, Remote Server Administration Tools are included as optional features in Windows Server 2019 and may be deployed using the Add Roles and Features dialog in Server Manager. Therefore, a Remote Server Administration Tools Windows Server 2019 download is not necessary.

Method 1. Install the RSAT via Windows features

Step 1. Click Start, then find Server Manager.

Step 2. Click Add roles and features.

Step 3. In the Add Roles and Features Wizard, click Installation Type first. Then tick Role-based or feature-based installation.

Step 4. Click Server Selection, tick Select a server from the server pool, then select the server you want to install the Remote Server Administration Tools (RSAT) on.

Step 5. Click Server Roles and then Next.

Step 6. Click Features, and then check the Remote Server Administration Tools check box.

Step 7. Some required supporting features such as the Web Server (IIS) role may be required. If prompted click Add Features.

Step 8. On the Web Server Role (IIS) page, click Next.

Step 9. Click Next on the Role Services page.

Step 10. Click Install on the Confirmation page.

Step 11. Wait for the installation to complete.

Step 12. Then you can find the RSAT tools under the Tools menu.

Method 2. Install the RSAT using PowerShell

Step 1. Search for Windows PowerShell in the search box and then open it.

Step 2. Input the following cmdlet to install all tools:

Get-WindowsCapability -Name RSAT* -Online | Add-WindowsCapability -Online

✍Note: If you just want to install specific tools, for example, Group Policy Management Console, you can input the following cmdlet:

Get-WindowsCapability -Name RSAT.GroupPolicy* -Online | Add-WindowsCapability -Online

Step 3. You can input the following cmdlet to confirm the installation:

Get-WindowsCapability -Name RSAT* -Online | Select-Object -Property DisplayName, State

This article is condensed from Anyviewer.com.  It is copied here so that I can find it when I need it.

Setting Up Radius on Unifi

Guide to Setting Up a RADIUS Authentication Server for Unifi Wireless Network

Overview

This guide will walk you through setting up a RADIUS authentication server on your Windows Active Directory domain to allow staff to log in to your Unifi wireless network using their AD credentials. Additionally, we will configure certificate-based authentication for staff laptops to enable automatic WiFi logins. We will also configure VLAN assignments so that students using RADIUS authentication are assigned a different VLAN than staff.


Step 1: Install and Configure Network Policy Server (NPS) on Windows Server

  1. Install NPS
    • Open Server Manager on your Windows Server.
    • Click Manage > Add Roles and Features.
    • Select Network Policy and Access Services and then Network Policy Server (NPS).
    • Complete the installation.
  2. Register NPS with Active Directory
    • Open NPS via Server Manager > Tools > Network Policy Server.
    • Right-click NPS (Local) and select Register Server in Active Directory.
    • Confirm the registration.
  3. Add a RADIUS Client (Unifi Controller)
    • Expand RADIUS Clients and Servers in NPS.
    • Right-click RADIUS Clients, select New.
    • Set a Friendly Name (e.g., “Unifi Controller”).
    • Enter the IP address of your Unifi AP Range. (e.g, 10.66.4.1/22)
    • Set a Shared Secret (you’ll need this later in Unifi settings).
    • Click OK.

Step 2: Configure Network Policy for Staff and Student Authentication with VLAN Assignments

  1. Create a New Network Policy for Staff
    • Expand Policies, right-click Network Policies, and select New.
    • Name the policy (e.g., “Staff WiFi Authentication”).
    • Click Next.
  2. Specify Conditions
    • Click Add and select User Groups.
    • Choose Domain Users or a specific AD security group (e.g., “Employees”).
    • Click Next.
  3. Configure Authentication Methods
    • Select Microsoft: Protected EAP (PEAP).
    • Click Edit and select a valid certificate (see Step 3 for issuing a certificate).
    • Ensure EAP-MSCHAPv2 is checked.
    • Check Wireless – IEEE 802.11 in the NAS Port Type
    • Click Next.
  1. Configure VLAN Assignment for Staff
    • Under Settings > Standard RADIUS Attributes, add:
      • Tunnel-Medium-Type: Set to 802 (Wireless).
      • Tunnel-Pvt-Group-ID: Enter the VLAN ID for staff (e.g., “50”).
      • Tunnel-Tupe: Set to Virtual LANs (VLAN)
    • Click Next and Finish.
  2. Create a New Network Policy for Students
    • Follow the same above but changing the AD group and VLAN.

Step 3: Set Up a Certificate Authority for Device Authentication

  1. Install Certificate Services on Windows Server
    • Open Server Manager > Add Roles and Features.
    • Select Active Directory Certificate Services.
    • Install Certificate Authority (CA) and Network Device Enrollment Service (NDES).
  2. Create a Server Certificate for NPS
    • Open Certification Authority.
    • Right-click Certificate Templates, select Manage.
    • Duplicate the RAS and IAS Server template.
    • Name it “NPS Certificate”, enable Server Authentication.
    • Issue the certificate for the NPS server.
  3. Enroll Certificates for Staff Laptops
    • Open Group Policy Management.
    • Create a new GPO (e.g., “WiFi Cert Deployment”).
    • Navigate to Computer Configuration > Policies > Windows Settings > Public Key Policies > Automatic Certificate Request Settings.
    • Add Computer Certificate Enrollment Policy and apply it to staff laptops.

Step 4: Configure Unifi Controller for RADIUS Authentication

  1. Access Unifi Network Controller
    • Open the Unifi Controller.
    • Navigate to Settings > Profiles > RADIUS.
    • Click Create New RADIUS Profile.
  2. Add RADIUS Server Details
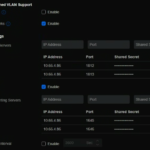
    • Set Authentication Server to your NPS server’s IP.
      • Set Port 1812 and enter the Shared Secret
    • Set Authentication Server to your NPS server’s IP.
      • Set Port 1813 and enter the Shared Secret
    • Set Accounting Server to your NPS server’s IP.
      • Set Port 1645 and enter the Shared Secret
    • Set Accounting Server to your NPS server’s IP.
      • Set Port 1646 and enter the Shared Secret
    • Click Save.
  3. Assign RADIUS Authentication to WiFi
    • Go to Settings > WiFi.
    • Create a new WiFi network.
    • Set Security to WPA2-Enterprise.
    • Choose the RADIUS Profile created earlier.
    • Save and apply settings.
    • The clients will now connect with their AD Username and Password to the VLAN specified in the NPS Policy.

Step 5: Test and Deploy

  1. Test AD Authentication
    • Connect a device to the WiFi.
    • Enter an AD username and password. (try staff or student)
    • Check NPS logs for authentication success and correct VLAN assignment.
  2. Test Certificate Authentication
    • Ensure a staff laptop with a certificate automatically connects.
    • Verify in the Unifi Controller that authentication was seamless.
  3. Monitor and Troubleshoot
    • Check Event Viewer > NPS Logs for errors.
    • Verify RADIUS settings in Unifi.
    • Ensure Group Policy is applied correctly.

Conclusion

You have successfully configured a RADIUS authentication server with Active Directory integration and certificate-based authentication for staff laptops. Additionally, VLAN assignments allow staff and students to be placed on separate networks automatically based on their authentication group.

THE ONLY RAM YOU WILL EVER NEED!!!!!

As stated in the title this DRAM will be the only RAM you will ever need! It is the DOMINATOR TITANIUM RGB 32GB and it comes in a purchase package of 2 so it adds up to 64GB. It is also double channel so if you have it again (which you will because of the purchase package) it will increase the performance!

It works with higher end builds however. But the people who buy this will probably be computer connoisseurs. I wouldn’t be saying all this stuff without testing the RAM myself of course. I thought it made all my multiple tabs open and run smoothly in my daily work. When I had games running it worked just as fine.

You wont get good quality like this from other RAMS. This thing is speedy let alone it gets the job done. Just look at the Amazon reviews.

I suggest that if you want good performance and a great experince you get this RAM ASAP!!!


NOTE: THIS IS FOR A SCHOOL PROJECT