Guide to Setting Up a RADIUS Authentication Server for Unifi Wireless Network
Overview
This guide will walk you through setting up a RADIUS authentication server on your Windows Active Directory domain to allow staff to log in to your Unifi wireless network using their AD credentials. Additionally, we will configure certificate-based authentication for staff laptops to enable automatic WiFi logins. We will also configure VLAN assignments so that students using RADIUS authentication are assigned a different VLAN than staff.
Step 1: Install and Configure Network Policy Server (NPS) on Windows Server
- Install NPS
- Open Server Manager on your Windows Server.
- Click Manage > Add Roles and Features.
- Select Network Policy and Access Services and then Network Policy Server (NPS).
- Complete the installation.
- Register NPS with Active Directory
- Open NPS via Server Manager > Tools > Network Policy Server.
- Right-click NPS (Local) and select Register Server in Active Directory.
- Confirm the registration.
- Add a RADIUS Client (Unifi Controller)
- Expand RADIUS Clients and Servers in NPS.
- Right-click RADIUS Clients, select New.
- Set a Friendly Name (e.g., “Unifi Controller”).
- Enter the IP address of your Unifi AP Range. (e.g, 10.66.4.1/22)
- Set a Shared Secret (you’ll need this later in Unifi settings).
- Click OK.
Step 2: Configure Network Policy for Staff and Student Authentication with VLAN Assignments
- Create a New Network Policy for Staff
- Expand Policies, right-click Network Policies, and select New.
- Name the policy (e.g., “Staff WiFi Authentication”).
- Click Next.
- Specify Conditions
- Click Add and select User Groups.
- Choose Domain Users or a specific AD security group (e.g., “Employees”).
- Click Next.
- Configure Authentication Methods
- Select Microsoft: Protected EAP (PEAP).
- Click Edit and select a valid certificate (see Step 3 for issuing a certificate).
- Ensure EAP-MSCHAPv2 is checked.
- Check Wireless – IEEE 802.11 in the NAS Port Type
-
- Click Next.
- Configure VLAN Assignment for Staff
- Under Settings > Standard RADIUS Attributes, add:
- Tunnel-Medium-Type: Set to 802 (Wireless).
- Tunnel-Pvt-Group-ID: Enter the VLAN ID for staff (e.g., “50”).
- Tunnel-Tupe: Set to Virtual LANs (VLAN)
- Click Next and Finish.
- Under Settings > Standard RADIUS Attributes, add:
- Create a New Network Policy for Students
- Follow the same above but changing the AD group and VLAN.
Step 3: Set Up a Certificate Authority for Device Authentication
- Install Certificate Services on Windows Server
- Open Server Manager > Add Roles and Features.
- Select Active Directory Certificate Services.
- Install Certificate Authority (CA) and Network Device Enrollment Service (NDES).
- Create a Server Certificate for NPS
- Open Certification Authority.
- Right-click Certificate Templates, select Manage.
- Duplicate the RAS and IAS Server template.
- Name it “NPS Certificate”, enable Server Authentication.
- Issue the certificate for the NPS server.
- Enroll Certificates for Staff Laptops
- Open Group Policy Management.
- Create a new GPO (e.g., “WiFi Cert Deployment”).
- Navigate to Computer Configuration > Policies > Windows Settings > Public Key Policies > Automatic Certificate Request Settings.
- Add Computer Certificate Enrollment Policy and apply it to staff laptops.
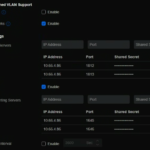
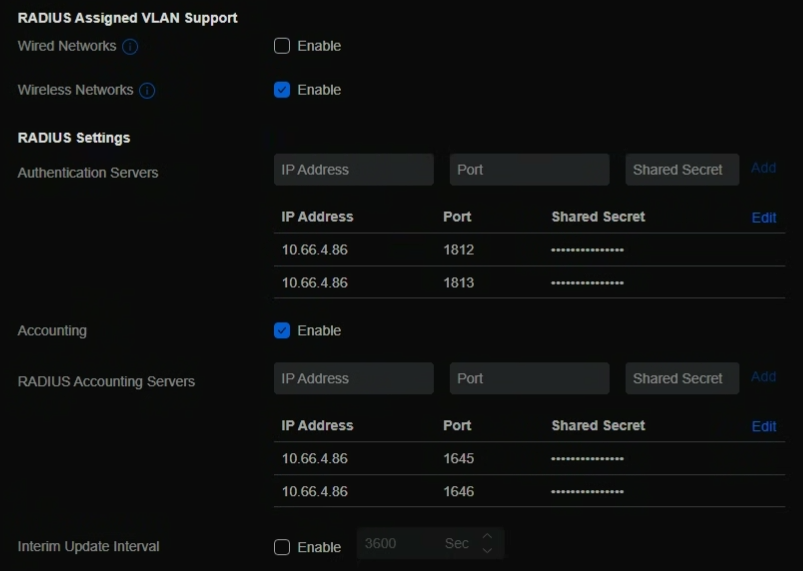
Step 4: Configure Unifi Controller for RADIUS Authentication
- Access Unifi Network Controller
- Open the Unifi Controller.
- Navigate to Settings > Profiles > RADIUS.
- Click Create New RADIUS Profile.
 Add RADIUS Server Details
- Set Authentication Server to your NPS server’s IP.
- Set Port 1812 and enter the Shared Secret
- Set Authentication Server to your NPS server’s IP.
- Set Port 1813 and enter the Shared Secret
- Set Accounting Server to your NPS server’s IP.
- Set Port 1645 and enter the Shared Secret
- Set Accounting Server to your NPS server’s IP.
- Set Port 1646 and enter the Shared Secret
- Click Save.
- Set Authentication Server to your NPS server’s IP.
- Assign RADIUS Authentication to WiFi
- Go to Settings > WiFi.
- Create a new WiFi network.
- Set Security to WPA2-Enterprise.
- Choose the RADIUS Profile created earlier.
- Save and apply settings.
- The clients will now connect with their AD Username and Password to the VLAN specified in the NPS Policy.
Step 5: Test and Deploy
- Test AD Authentication
- Connect a device to the WiFi.
- Enter an AD username and password. (try staff or student)
- Check NPS logs for authentication success and correct VLAN assignment.
- Test Certificate Authentication
- Ensure a staff laptop with a certificate automatically connects.
- Verify in the Unifi Controller that authentication was seamless.
- Monitor and Troubleshoot
- Check Event Viewer > NPS Logs for errors.
- Verify RADIUS settings in Unifi.
- Ensure Group Policy is applied correctly.
Conclusion
You have successfully configured a RADIUS authentication server with Active Directory integration and certificate-based authentication for staff laptops. Additionally, VLAN assignments allow staff and students to be placed on separate networks automatically based on their authentication group.